My Cat Ignores Every Toy I Buy. A Self-Rolling Ball Finally Changed That (Mostly)
Let me count the toy graveyard under my couch: three crinkle balls, a catnip mouse with one ear chewed off, a laser pointer I lost somewhere in 2023, and a $40 “interactive” fish that flopped for exactly one afternoon before my cat decided it was furniture. Sound familiar? If your cat ignores every toy you buy, I get it. I spent two years buying toys before I figured out why most of them fail — and why one type finally worked.
Here’s the uncomfortable truth I had to admit: my cat wasn’t bored. She was unimpressed. A toy that sits still is not prey. A toy that moves the same way every time is prey she already caught. Cats hunt things that dart, pause, change direction without warning — and then vanish around a corner. That’s the whole game. Most toys we buy fail that test on day one.
Why static toys lose in 3 minutes flat
Watch a cat with a regular ball. Bat, bat, chase — and then it rolls under the sofa and stops. Game over. The “prey” is dead, and cats don’t play with dead things. Same with plush mice: once the catnip fades and the mouse stops smelling interesting, it’s a pillow. My cat gave her plush mouse about four days. The crinkle balls lasted a week, mostly because they made noise when stepped on by accident.
Laser pointers are the other trap. Cats love them — for about ten minutes — and then get frustrated, because they can never actually catch the dot. I stopped using ours when I noticed my cat started staring at the wall after I put it away, still hunting something that was never there. That frustration isn’t enrichment. It’s a tease. This one I’m comfortable saying: skip the laser. Your cat deserves a win at the end of the chase.
What actually worked: a ball that moves like prey
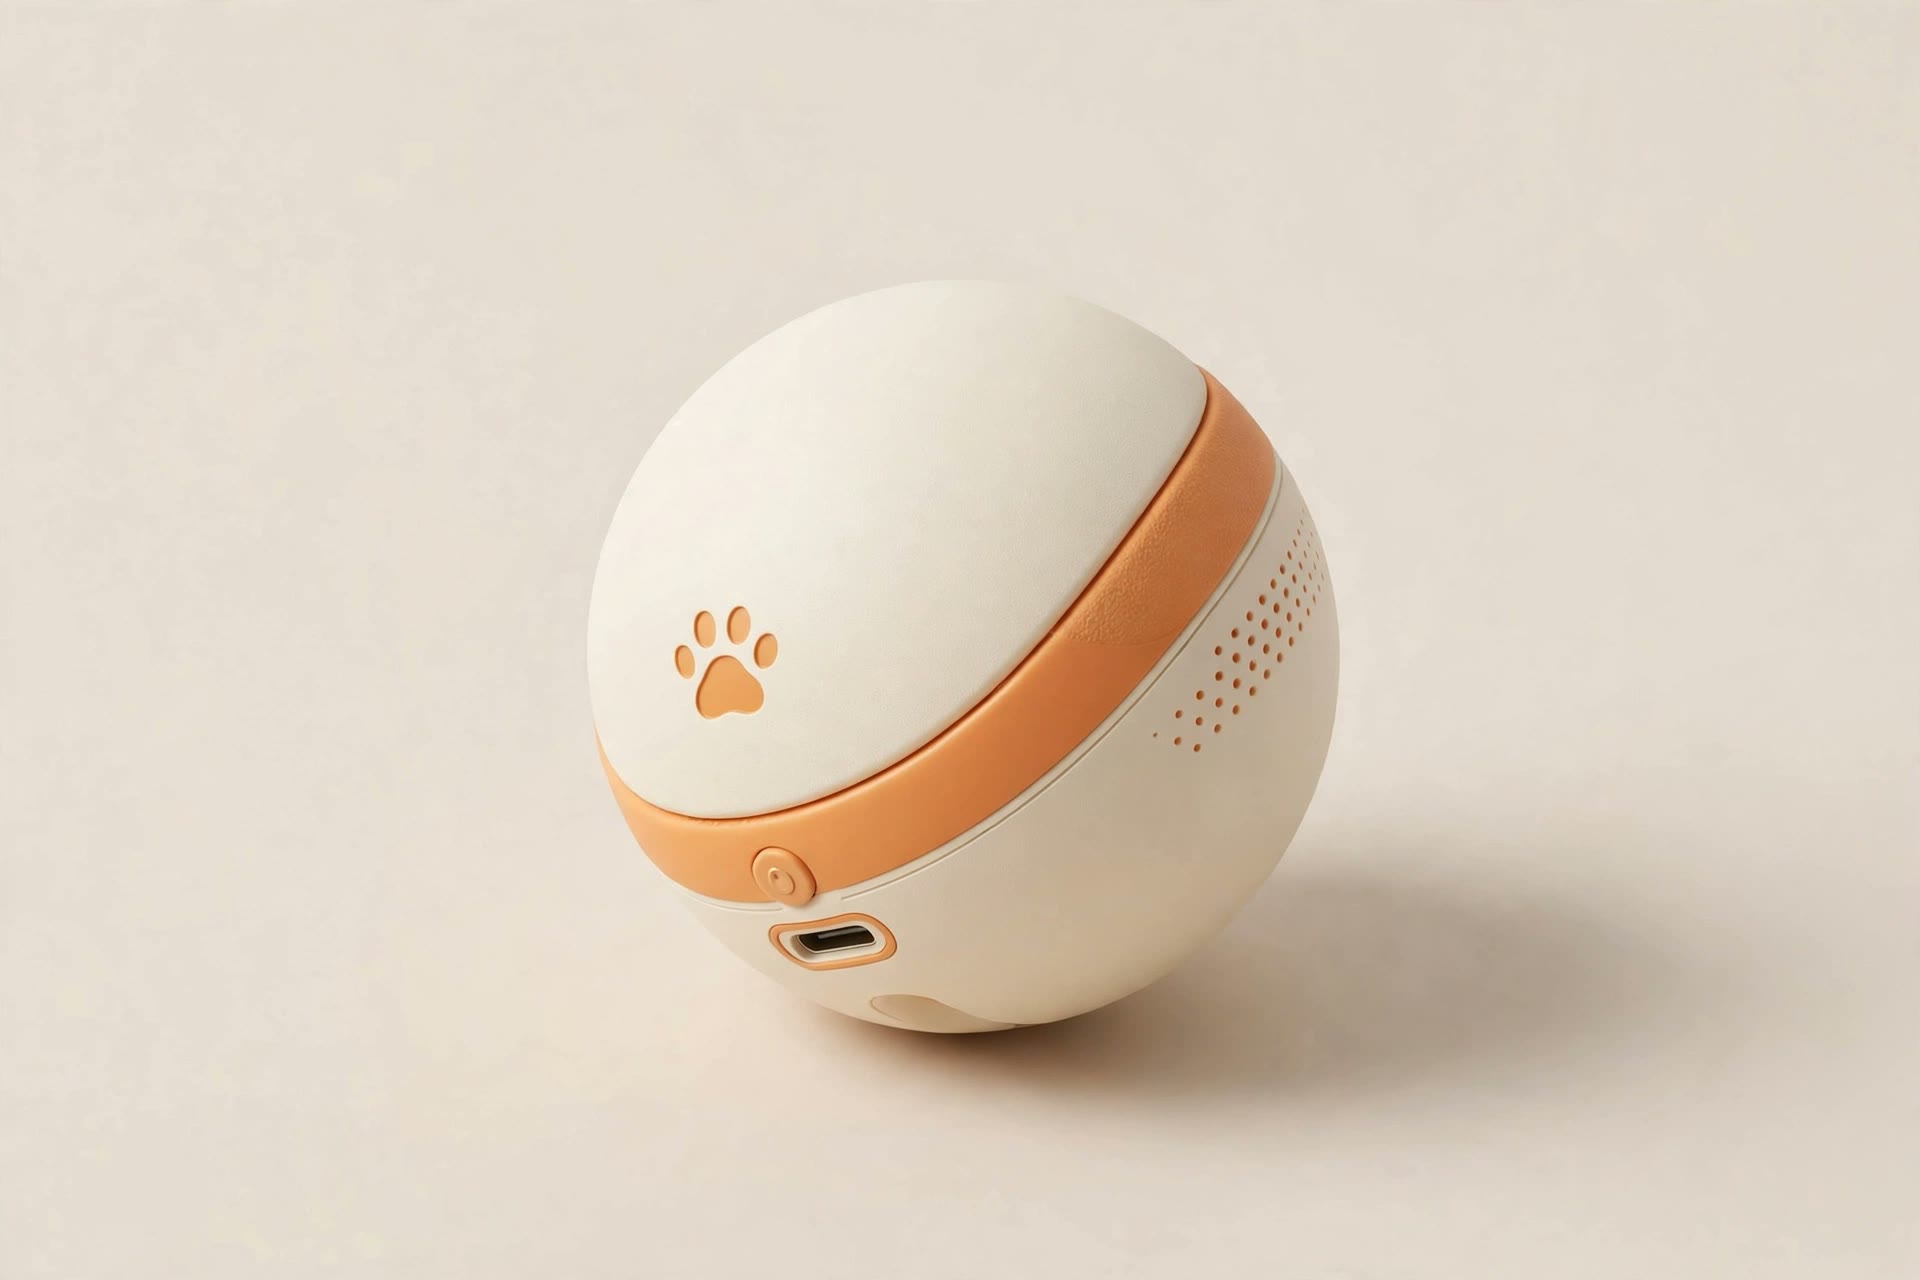
The toy that broke the pattern in my house was a self-rolling ball — specifically the Zoomie Ball. It’s a 7 cm, 85-gram ball with a smart sensor inside, and it rolls, bounces, pauses, and darts off in a new direction on its own. No remote, no app, no schedule you have to remember. You switch it on, put it down, and it behaves like something small and panicked trying to escape. That’s the difference: unpredictability. My cat can’t memorize its pattern because there isn’t one.
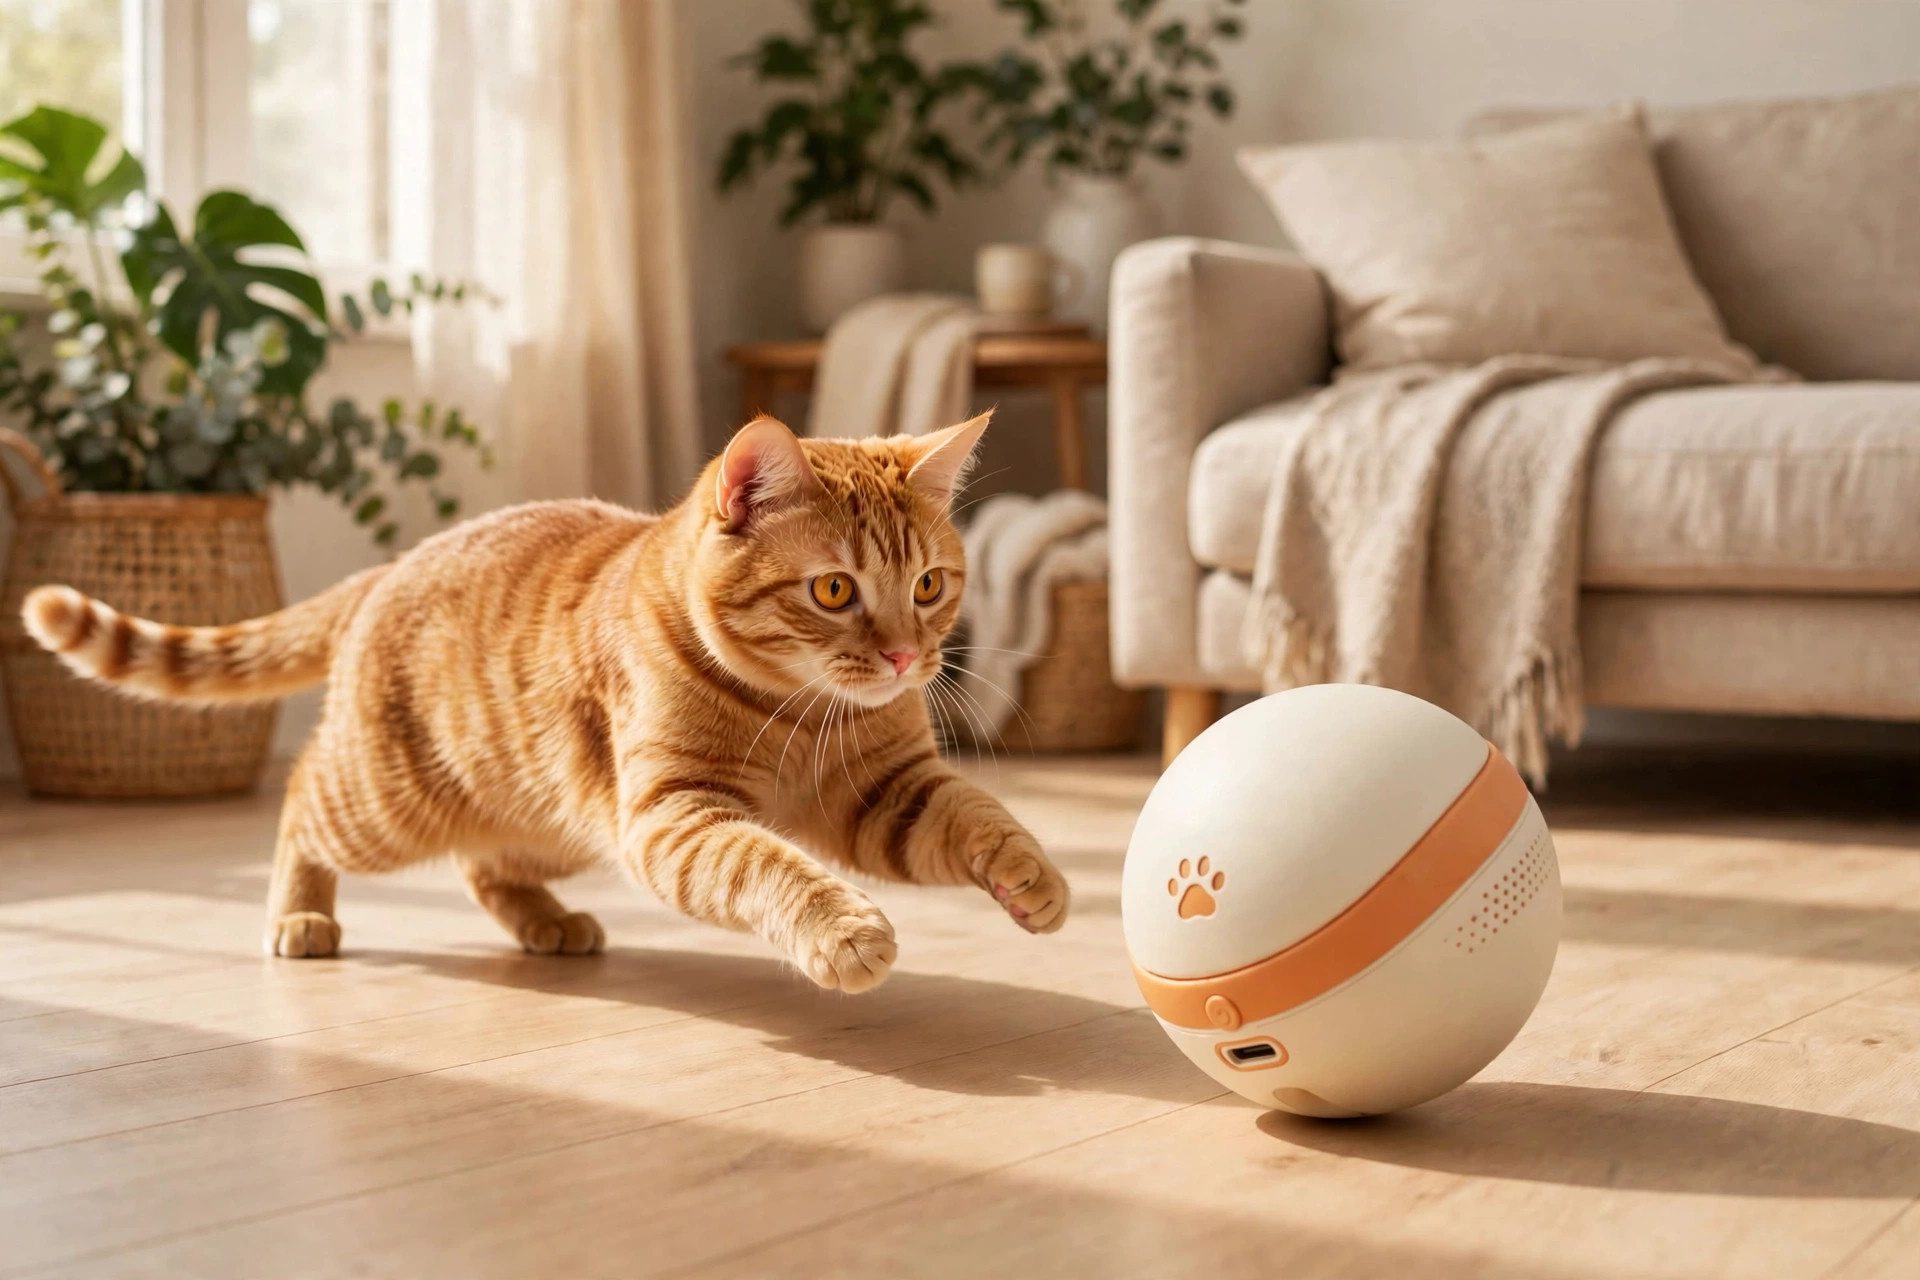
The first session lasted 22 minutes. I timed it, because I didn’t believe it. She stalked it, pounced, lost it behind the coffee table — and here’s the part that sold me — the ball’s obstacle sensor turned it away from the table leg and sent it darting back toward her. Prey that escapes and comes back is prey worth chasing twice.
The honest limits (because it’s not magic)
Now the part most reviews skip. A self-rolling ball is not a babysitter, and anyone selling it as one is lying to you.
It runs about 2 hours per charge. That’s a full charge taking roughly 1 hour on USB-C. Two hours sounds generous until you realize a bored indoor cat is awake for about 16 of them. Use it for the two sessions that matter — the morning zoomies and the pre-bedtime energy dump — not as an all-day background toy. I run ours at 8 a.m. and 8 p.m., ten to twenty minutes each, and that’s when it earns its keep.
It sleeps after 5 minutes idle, and wakes on touch. This is actually good design — it saves battery and it means the ball “comes alive” when your cat bats it, which restarts the hunt. But it also means a shy cat that watches from across the room for ten minutes will see a dead ball. For timid cats, start on the slowest of the three speed settings, and roll it yourself a few times so the cat connects the touch with the movement. My friend’s rescue took four days to go from watching to pouncing. Patience beats a faster motor.
It’s quiet, but not silent. Under 40 dB — quieter than a conversation, louder than a mouse. My cat doesn’t care. My light-sleeping partner did notice it the first night I left it running at 11 p.m. Lesson learned: the ball sleeps at night. Don’t run it after bedtime unless you enjoy being woken up by a tiny robot prey animal under your bed.
It needs floor space. A 7 cm ball in a studio apartment full of chair legs will spend half its time turning away from furniture. Clear a runway — even a 2-meter stretch of open floor — and the ball’s random darting actually looks like hunting instead of pinball. And wipe it with a damp cloth when it gets dusty; don’t submerge it in water, and don’t run it on wet floors.
What about the cats who still ignore it?
Fair question, because I know one: my sister’s 14-year-old senior, who looked at the ball, looked at me, and went back to sleep. Here’s my honest read. Some cats are done with high-speed play, and no toy fixes age or arthritis. For that cat, the slowest speed setting plus a feather wand session — ten minutes of slow, low-to-the-ground play — works better than any gadget. The Flutter Wand is still the best bonding tool I own: a 45 cm fiberglass rod, 90 cm cord, real feathers, and it puts your hand far enough from the claws that you can play without flinching.
The ball and the wand aren’t rivals. They’re a rotation. The ball covers the solo sessions while you’re at work; the wand covers the bonding session when you’re home. Two toys, two jobs. That’s the whole system in my house now, and the toy graveyard under the couch hasn’t grown in months.
So is it worth buying?
Ask yourself two questions. Does your cat still chase things — a string, a shadow, your ankles at 6 a.m.? And do you have a stretch of open floor? Yes to both, and a self-rolling ball is the rare cat toy that survives past week one in my house. No to the first — a senior or a genuinely low-drive cat — and your money is better spent on a wand and ten minutes of your evening.
One more thing I wish I’d known earlier: rotate it. Even an unpredictable ball gets boring if it’s out 24/7. I put ours away for two or three days a week, and every time it comes back out, my cat treats it like a new animal moved in. Novelty is the cheapest enrichment there is. Use it.
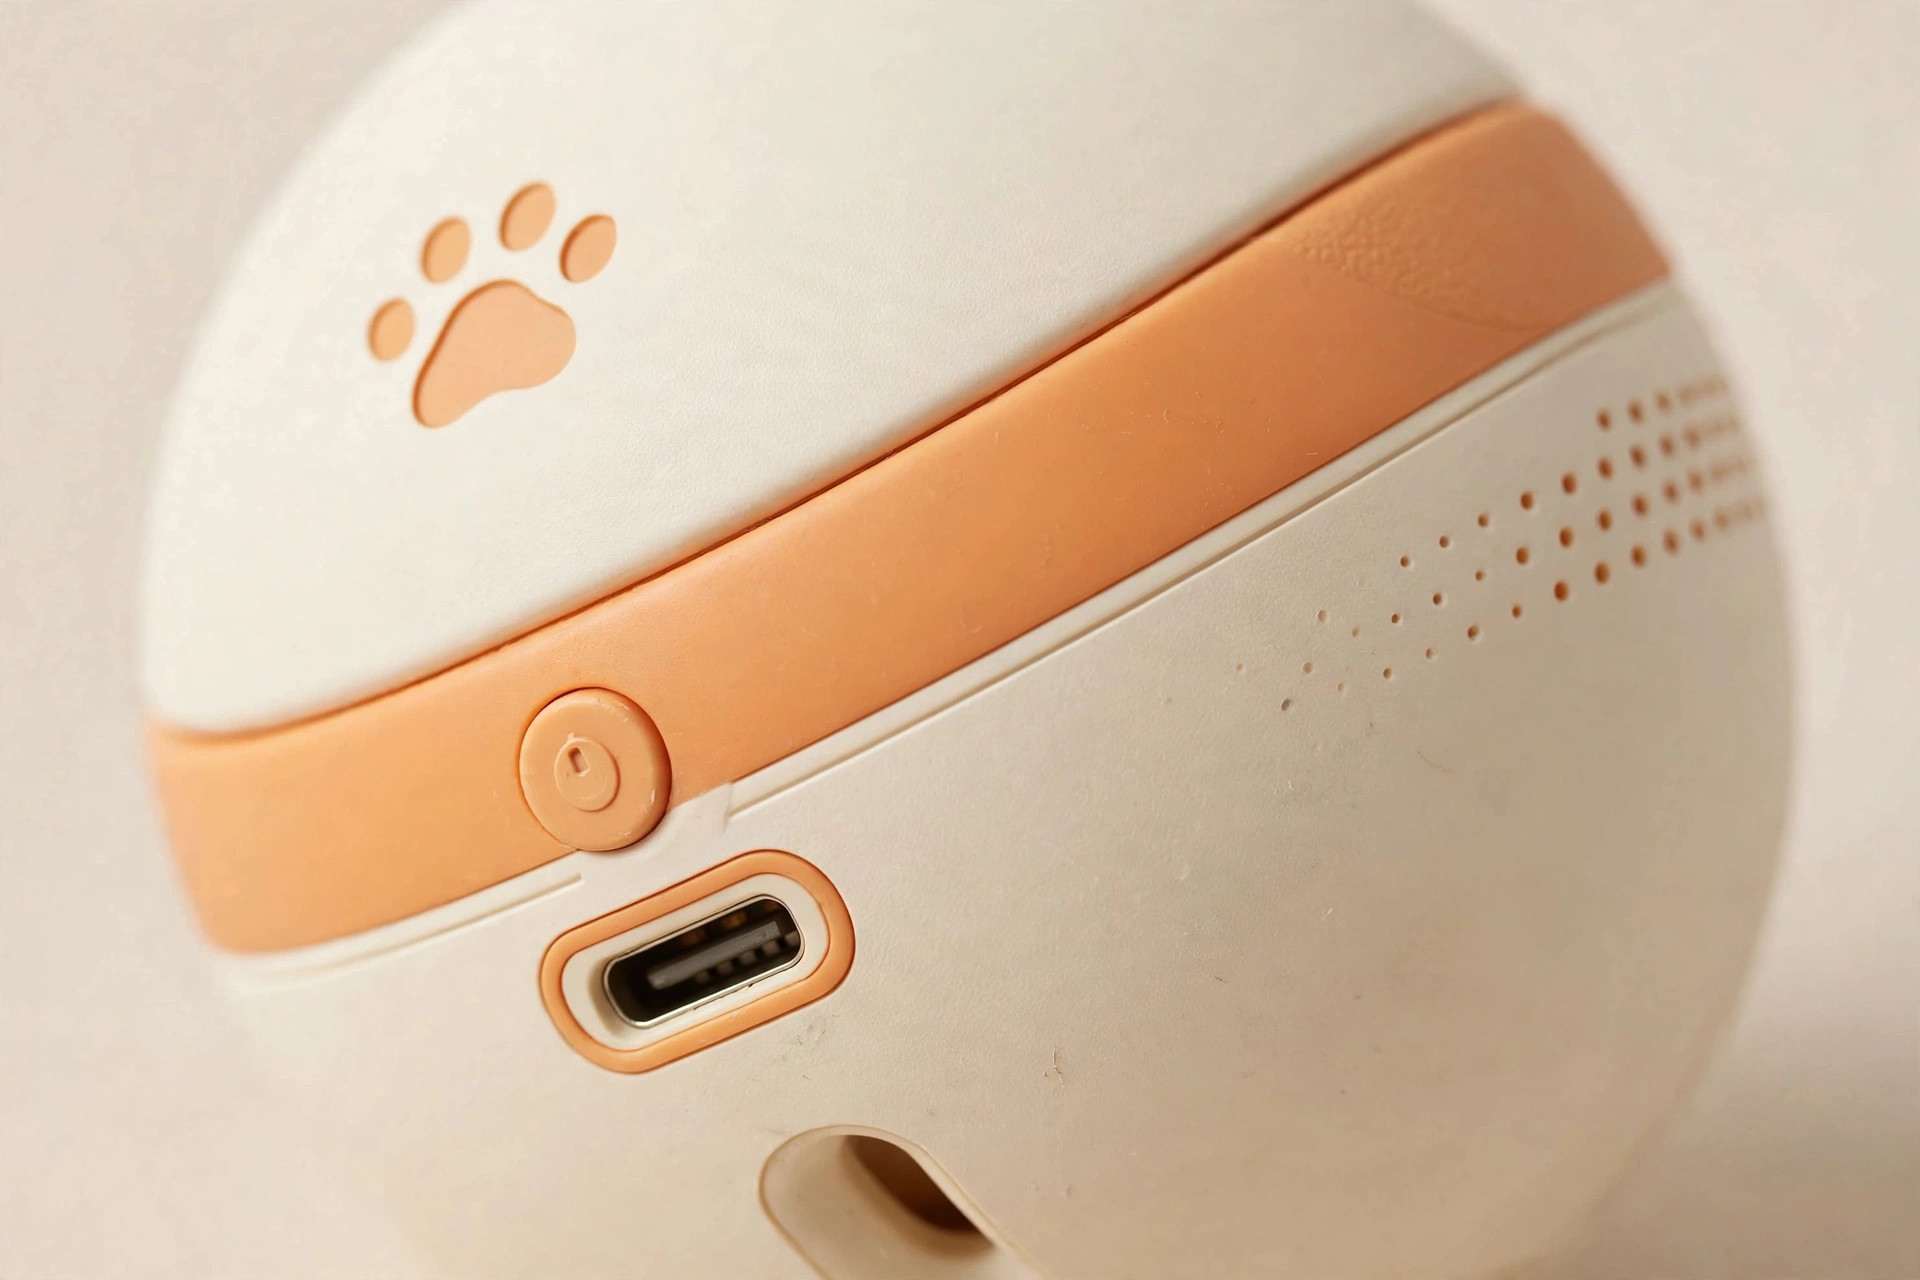
Recommended: Zoomie Ball – Interactive Cat Toy — 7 cm, 85 g, 3 speeds, under 40 dB, 2 hours per charge, obstacle avoidance. The solo-play toy that actually gets chased. Pair it with the Flutter Wand for the daily bonding session.
Are Retractable Leashes Bad? What Actually Goes Wrong (and How to Use One Safely)
A trainer once told me, in front of a whole puppy class, that retractable leashes should be illegal. The woman next to me quietly rolled hers up and stuffed it in her bag. I laughed — then went home and googled it, because honestly? I’d been using one for months and had no idea it was controversial.
So: are retractable leashes actually bad? Or is this one of those dog-world holy wars where both sides are half right? I’ve been on both sides of this argument now. Here’s the honest version.
Why trainers hate them (and they’re not entirely wrong)
The complaints come in three flavors, and two of them are legit.
1. Thin round cords cause injuries. Most horror stories — rope burns, snapped cords, dogs wrapping the line around another dog’s legs — involve cheap round-cord retractables. A thin cord under tension is basically a cheese wire. This is real, and it’s the strongest argument in the whole debate.
2. They teach dogs that pulling works. Sort of true. If your dog pulls and the leash keeps giving, it learns that pressure = forward progress. A retractable won’t fix a puller; it just gives the pulling more room to happen. Fair criticism.
3. Dogs dart into danger. A dog on 8 meters of line can reach the road before you can reel it in. Also true — if you let it. This one is a handling problem, not a product problem. Which brings me to my actual point.
My take: it’s a tool problem, not a category problem
Here’s what changed my mind. I switched from a cheap round-cord retractable to a flat-tape one, and the difference was night and day. A 16mm flat nylon tape doesn’t cut into your hands the way a round cord does. It doesn’t twist into knots. It retracts smoothly instead of whipping back. Most of the “retractable leash horror story” energy comes from the worst 15-dollar round-cord versions, not from the concept itself.
A hammer isn’t bad because some people hit their thumbs. The question is whether you use it right. So let’s talk about that.
3 rules that make a retractable leash safe
Rule 1: Lock it short around roads, dogs, and people. This is the big one. Any retractable worth buying has a one-touch brake and a lock. Thumb down = instant stop. Approaching a crosswalk? Lock it at 1.5 meters and it’s just a regular leash. The full length is for the park and the trail, not the sidewalk next to traffic. The Roam’s brake sits right under your thumb — you don’t fumble for it.
Rule 2: Match the length and weight rating to your dog. Don’t buy the 8-meter version for city sidewalks; that’s asking for trouble. The three sizes exist for a reason: 3m for courtyards and small parks (dogs up to 15 kg), 5m for parks and neighborhoods (dogs up to 25 kg), 8m for trails and open spaces (dogs up to 50 kg). An undersized retractable with an overpowered dog is how springs fail. Roam’s spring is tested for 50,000+ retractions, but even a great spring can’t defy physics — buy for your actual dog.
Rule 3: It’s not a chew toy, and inspect the tape. No retractable survives being chewed, and a frayed tape is a weak tape. Glance at the 16mm tape every few weeks. Takes ten seconds. This applies to every leash you own, honestly.
Where a retractable leash genuinely shines
Sniff walks. That’s the answer. My beagle’s brain runs on smells, and a 5-meter flat tape lets her do a proper “sniffari” — zigzagging between trees, reading every bush’s news — while I stroll behind her like a normal person instead of being dragged tree to tree. She gets 4x the enrichment. I get to keep my shoulder.
It’s also the best cheap tool for recall training in safe, open areas. Long line, dog wanders, you call, dog comes back, treat party. The brake gives you an emergency stop while the habit builds. Once recall is solid? You might not need it anymore. That’s fine — tools can be temporary.
Who should skip it
I’ll be direct: don’t buy one if your dog is a serious puller and you’re not working on it — you’ll just fund a longer pulling habit. Don’t buy one for a reactive dog you can’t control at close range. And skip the ultra-cheap round-cord models entirely; the thin cord versions are where nearly every injury story starts. If the listing doesn’t say the tape width, that’s your answer.
Still on the fence? Ask yourself this: where do you actually walk? Open park, quiet trail, big field — a flat-tape retractable will make those walks better. Busy city sidewalk every day — stick with a fixed leash and save your money.
The one I’d actually recommend
After trying the cheap round-cord kind (never again) and a couple of mid-range tapes, the Roam Retractable Leash is the one that stayed on my hook. Flat 16mm nylon tape instead of a round cord, a one-touch brake with a real lock, an ergonomic anti-slip grip that doesn’t cramp your hand on long walks, and three honest sizes — 3m, 5m, 8m — matched to 15, 25, and 50 kg dogs. ABS housing, chrome snap hook, spring tested past 50,000 retractions.
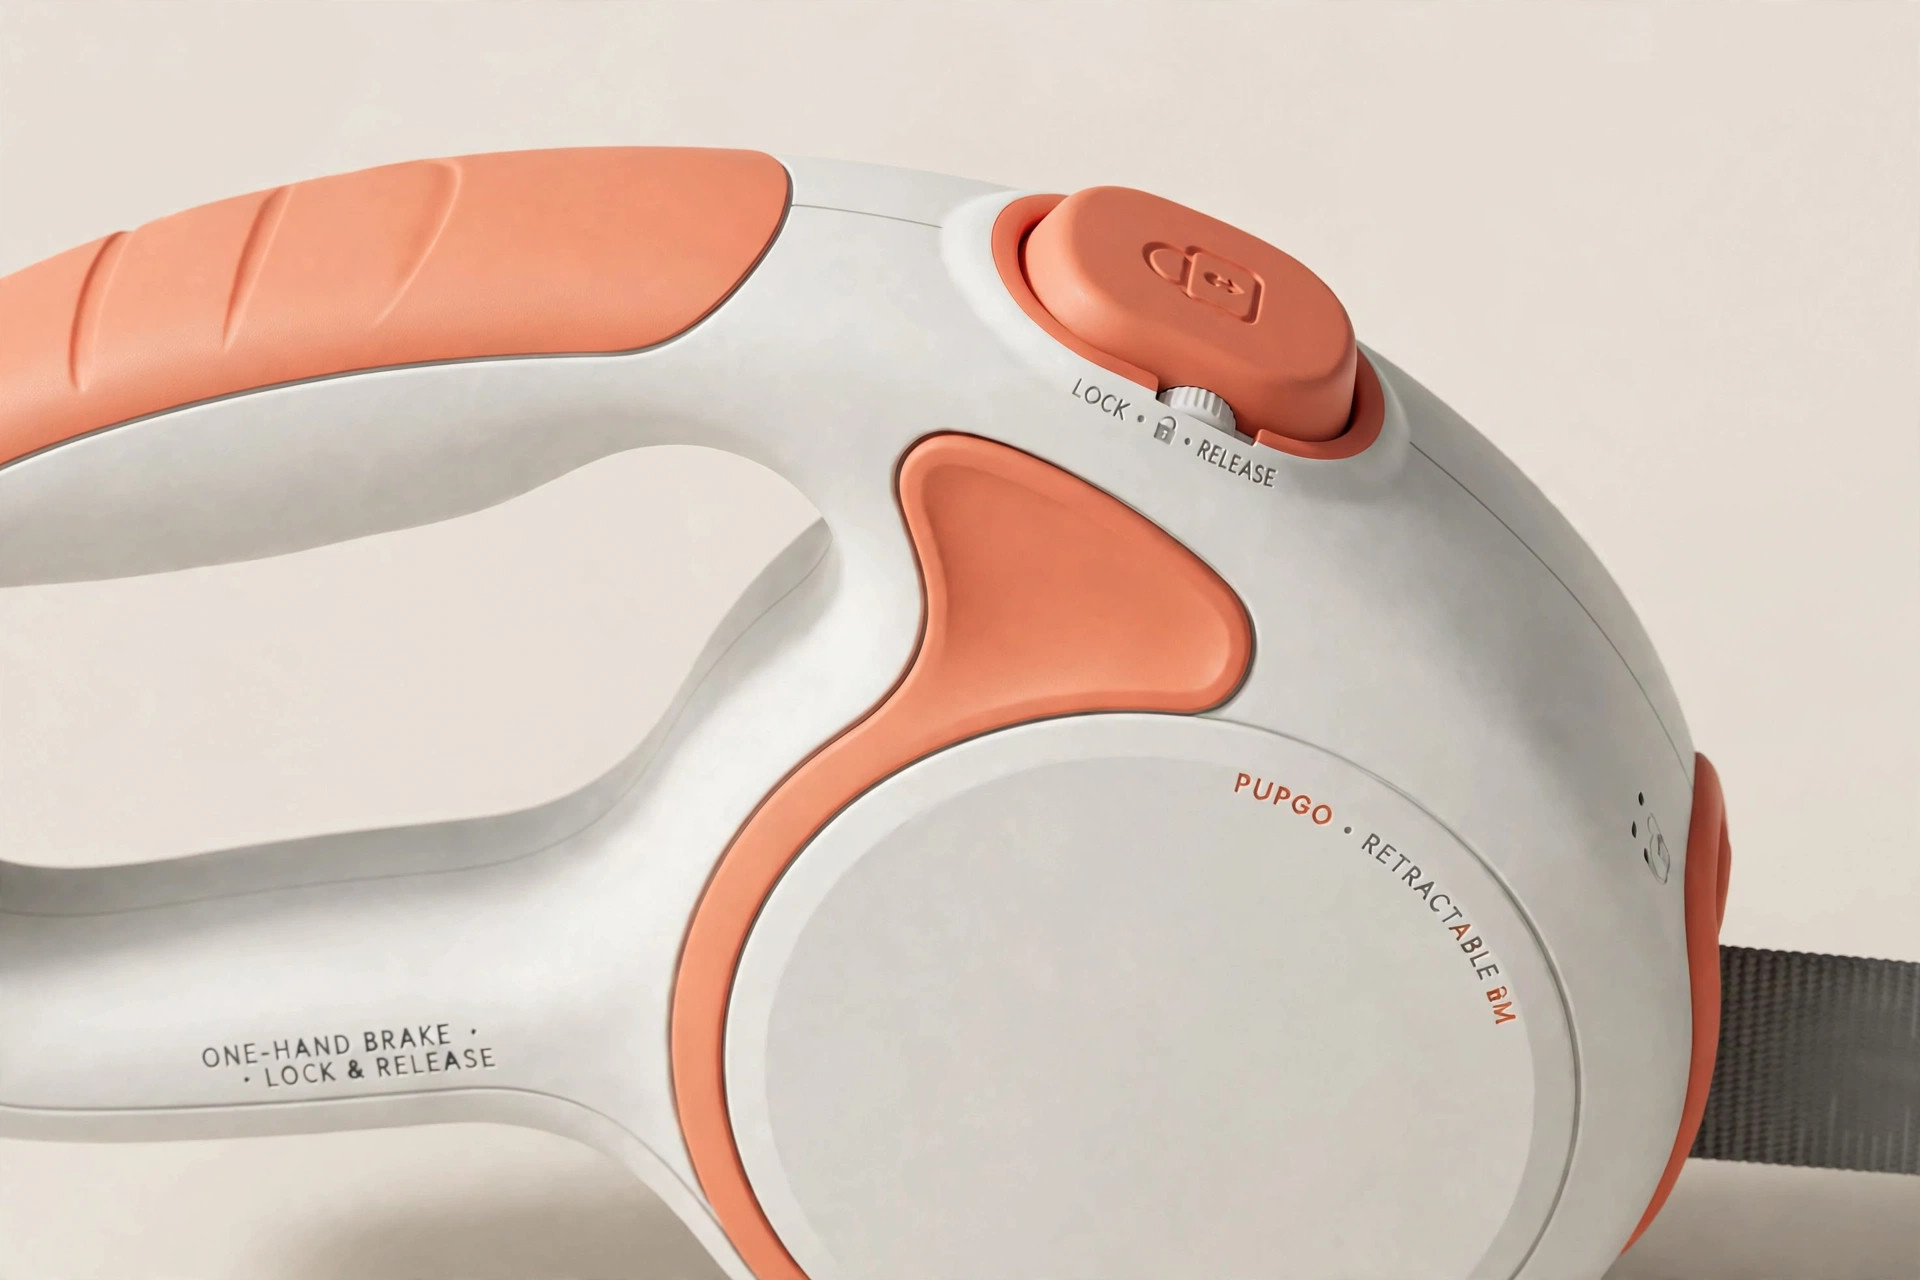
It’s the leash I use for weekend trail walks now. Locked short at the trailhead, full 8 meters once we’re in the trees. My dog gets her sniffari. I keep my thumb on the brake and my sanity intact.
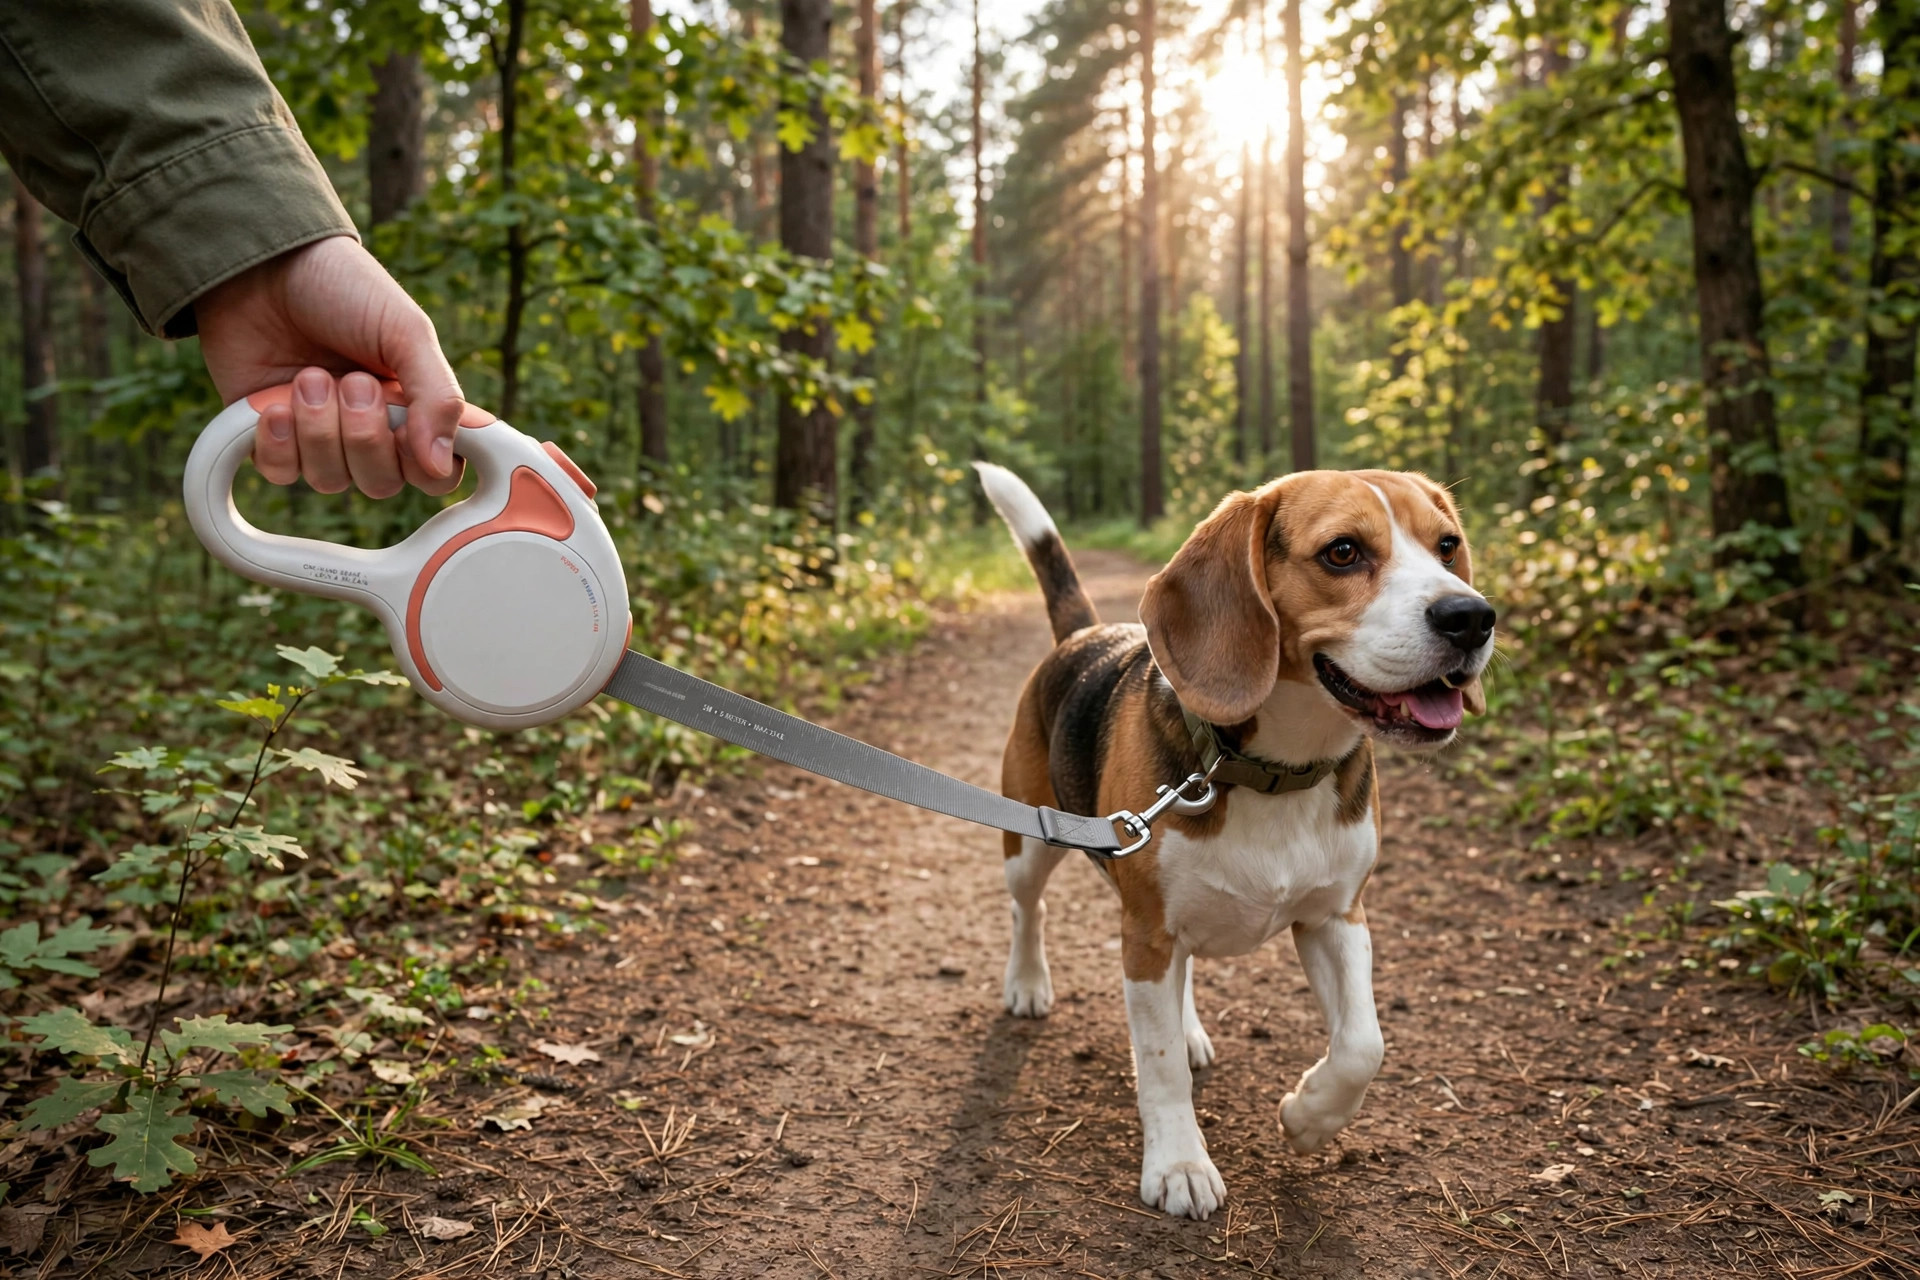
So, are retractable leashes bad? The cheap round-cord ones — yeah, pretty much. A well-made flat-tape one, used with the brake and a bit of sense? It’s one of the best walk upgrades you can buy. The tool was never the villain. The 8 meters of unsupervised freedom was.
Recommended: Roam Retractable Leash – 5m — flat tape, one-touch brake, up to 25 kg. The trail-walk upgrade.
Kitten Biting Your Hands and Feet? Redirect the Hunt Drive With a Feather Wand
It’s 7 in the morning. You’re half awake, feet under the blanket, and suddenly — tiny fangs sink into your ankle. Then your other ankle. Then your hand when you reach down to push the little monster away.
If you live with a kitten, you know this ambush routine by heart. And I have bad news and good news. The bad news: yelling “no!”, clapping your hands, or spritzing water at them won’t fix it. I tried all three with my first kitten. All I got was a kitten who learned to bite me when I wasn’t looking.
The good news? Your kitten isn’t being mean. It’s not dominant, it’s not angry, and it definitely doesn’t hate you. It’s hunting you. And once you understand that, the fix is almost embarrassingly simple.
Your ankles look exactly like prey
Here’s the thing nobody tells new kitten owners: a kitten’s brain runs one program on loop — stalk, chase, pounce, bite, kick. In the wild, a kitten practices this sequence hundreds of times a day on leaves, bugs, and its littermates. In your apartment, the only things that move at ankle height and twitch under fabric are your feet.
So the biting isn’t a behavior problem. It’s a hunting problem with no outlet. Punishing a kitten for hunting is like punishing a retriever for fetching — you’re fighting the animal’s entire operating system, and you’ll lose.
What actually works is giving that hunt drive somewhere better to go. Every single day. For about ten minutes.
The 10-minute hunt that fixes the biting
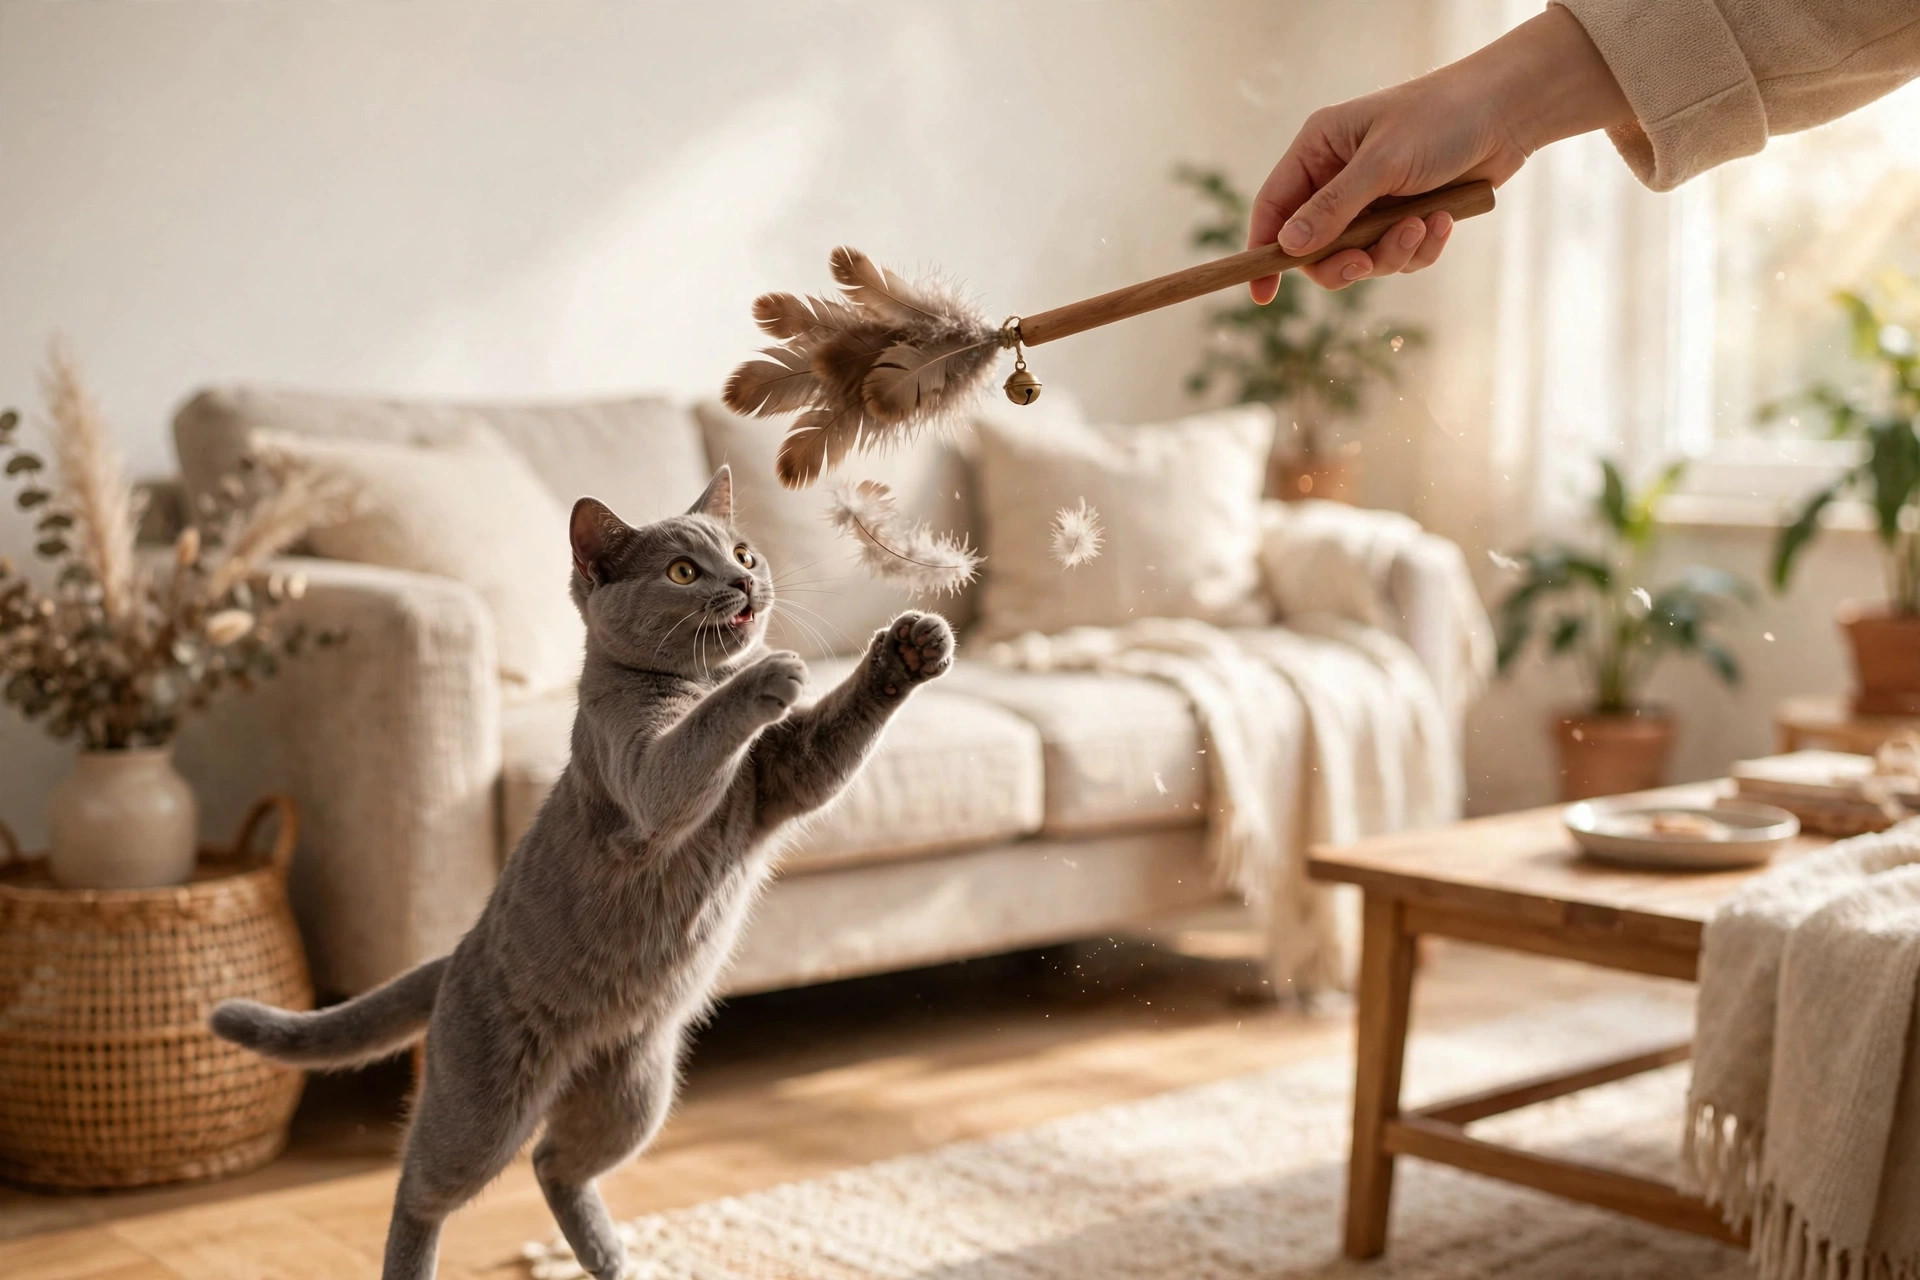
A feather wand isn’t a toy you wave randomly while scrolling your phone. Used right, it’s a full hunting simulation — and the structure matters more than you’d think.
Minutes 1–3: the stalk. Drag the feathers slowly along the floor, around furniture corners, pausing often. Let your kitten crouch and wiggle its butt. That butt-wiggle is the whole point — it’s the stalk phase, and skipping it is why so many people say “my cat gets bored of the wand in three minutes.” They never let the cat stalk.
Minutes 4–8: the chase. Now speed up. Flick the feathers like a bird changing direction. Let them catch it sometimes — a hunter that never catches anything gives up. Roughly one catch every minute keeps the game alive.
Minutes 9–10: the kill and the meal. Let your kitten “kill” the feathers, bunny-kick them, carry them off. Then — this is the part everyone skips — feed a small meal or treat right after. Hunt, catch, eat, groom, sleep: that’s the full feline sequence. End the game with food and your kitten will groom itself and pass out instead of hunting your toes at midnight.
Two weeks of this, once or twice a day, and the ankle ambushes drop off a cliff. Not because the kitten learned a lesson — because the hunting account is already paid in full.
Not all feather wands survive a real hunter

Now the opinionated part. Most cheap feather wands are garbage, and I say that as someone who bought a five-pack for $6 and watched my kitten destroy all five in a week. Dyed feathers glued to a bamboo stick: the glue fails, the stick snaps mid-pounce, and your kitten ends up chewing loose feathers. Skip them.
Here’s what actually matters in a wand, learned the hard way:
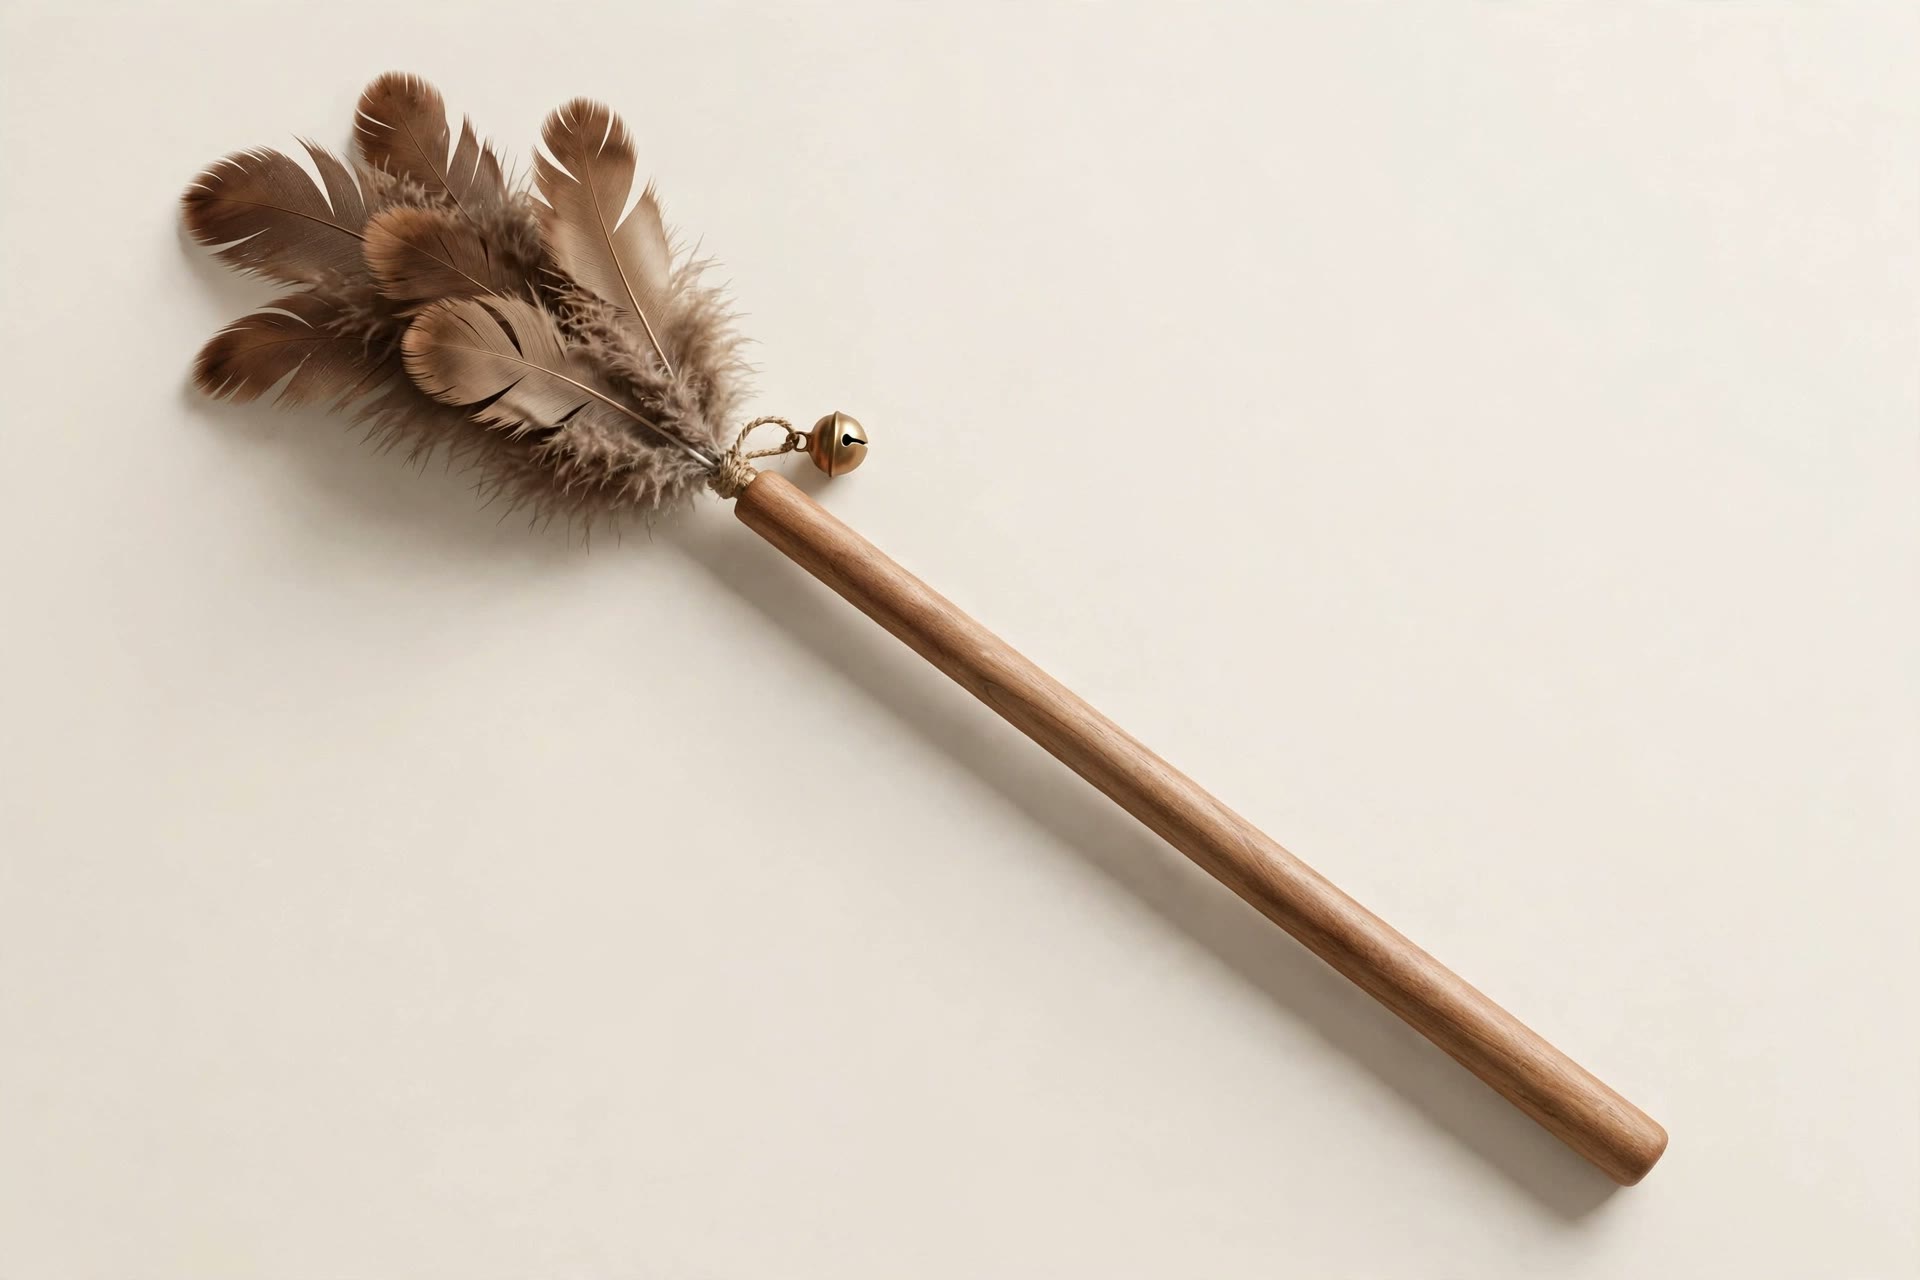
Real feathers, not dyed fluff. Cats can tell. Natural turkey and guinea fowl feathers have a texture and flutter that synthetic substitutes can’t fake — the barbs catch the air differently, and the subtle color variation reads as “real bird” to a cat’s eyes. The Flutter Wand’s head is about 15 cm of exactly that, and you can see the difference in the close-up above.
A rod that bends instead of breaking. When a kitten goes full predator — all four paws, full body weight, bunny-kicking — a rigid stick either snaps or yanks out of your hand. A flexible fiberglass rod bends with the chaos and whips the feathers through the air like a bird in flight. The 45 cm rod on this one has survived my cat’s worst, which is saying something.
Distance between your skin and the “prey.” This is the whole point of the exercise, right? A 90 cm cord means the feathers dance a full meter away from your fingers. Your hands stay safe from claws even when the game gets wild. Short-string wands defeat the purpose — you might as well dangle your hand in front of the kitten and call it a day.
One honest note from the product photos: the feather head carries a small brass bell. It’s an extra sound cue that drives sound-oriented hunters wild. If your cat is noise-sensitive, that’s what the quick-swap head is for — pop the head off in seconds and switch to a bell-free one. Replacement heads are available separately, which also matters because a chewed-up feather head should be retired, not repaired with hope.
The two rules that make it all work
Rule one: never leave the wand out. A feather wand on the floor is both a chewing hazard (string plus feathers, unsupervised — no) and a novelty killer. Put it in a closet after every session. A wand that only appears for hunt time stays exciting for months. One that lives on the floor becomes furniture by Thursday.
Rule two: hands are never toys. This one is on you, not the cat. The moment you wiggle your fingers at a kitten “playfully,” you’ve taught it that hands are prey. Redirect every time — fingers stop, wand appears. Consistency here is worth more than any product.
And when you’re not home? A wand needs a human. For solo hours, a self-rolling toy like the Zoomie Ball keeps the hunting brain busy until you’re back for the real session.
Try it tonight
Your kitten will bite you again tomorrow morning — habits don’t vanish overnight. But start the ten-minute hunt tonight, end it with a meal, and watch what happens over the next two weeks. The ankle ambushes fade. The 3 a.m. parkour sessions calm down. And you get the version of your kitten that curls up on your chest instead of attacking it.
That’s the trade: ten minutes of being the bird, and you get your ankles back.
Related products: Flutter Wand – Feather Teaser (natural turkey & guinea fowl feathers, flexible fiberglass rod, 90 cm cord, quick-swap head) · Zoomie Ball – Interactive Cat Toy (self-rolling ball for solo play when you’re not home)
Pulling Like a Freight Train? What a P-Leash (Slip Lead) Really Is and How to Use One Without Hurting Your Dog
Last spring my neighbor’s Labrador spotted a squirrel across the street and took me with him — thirty kilos of pure optimism, me water-skiing behind in socks on wet pavement. That was the morning I stopped pretending my flat collar was “working fine.”
If your walks feel like arm day at the gym, someone has probably told you to “just get a slip lead.” Then you googled it, saw the words “choke chain” in the same paragraph, and closed the tab. I did exactly that for two years. Here’s everything I wish someone had explained before I finally tried one.
What a P-leash actually is
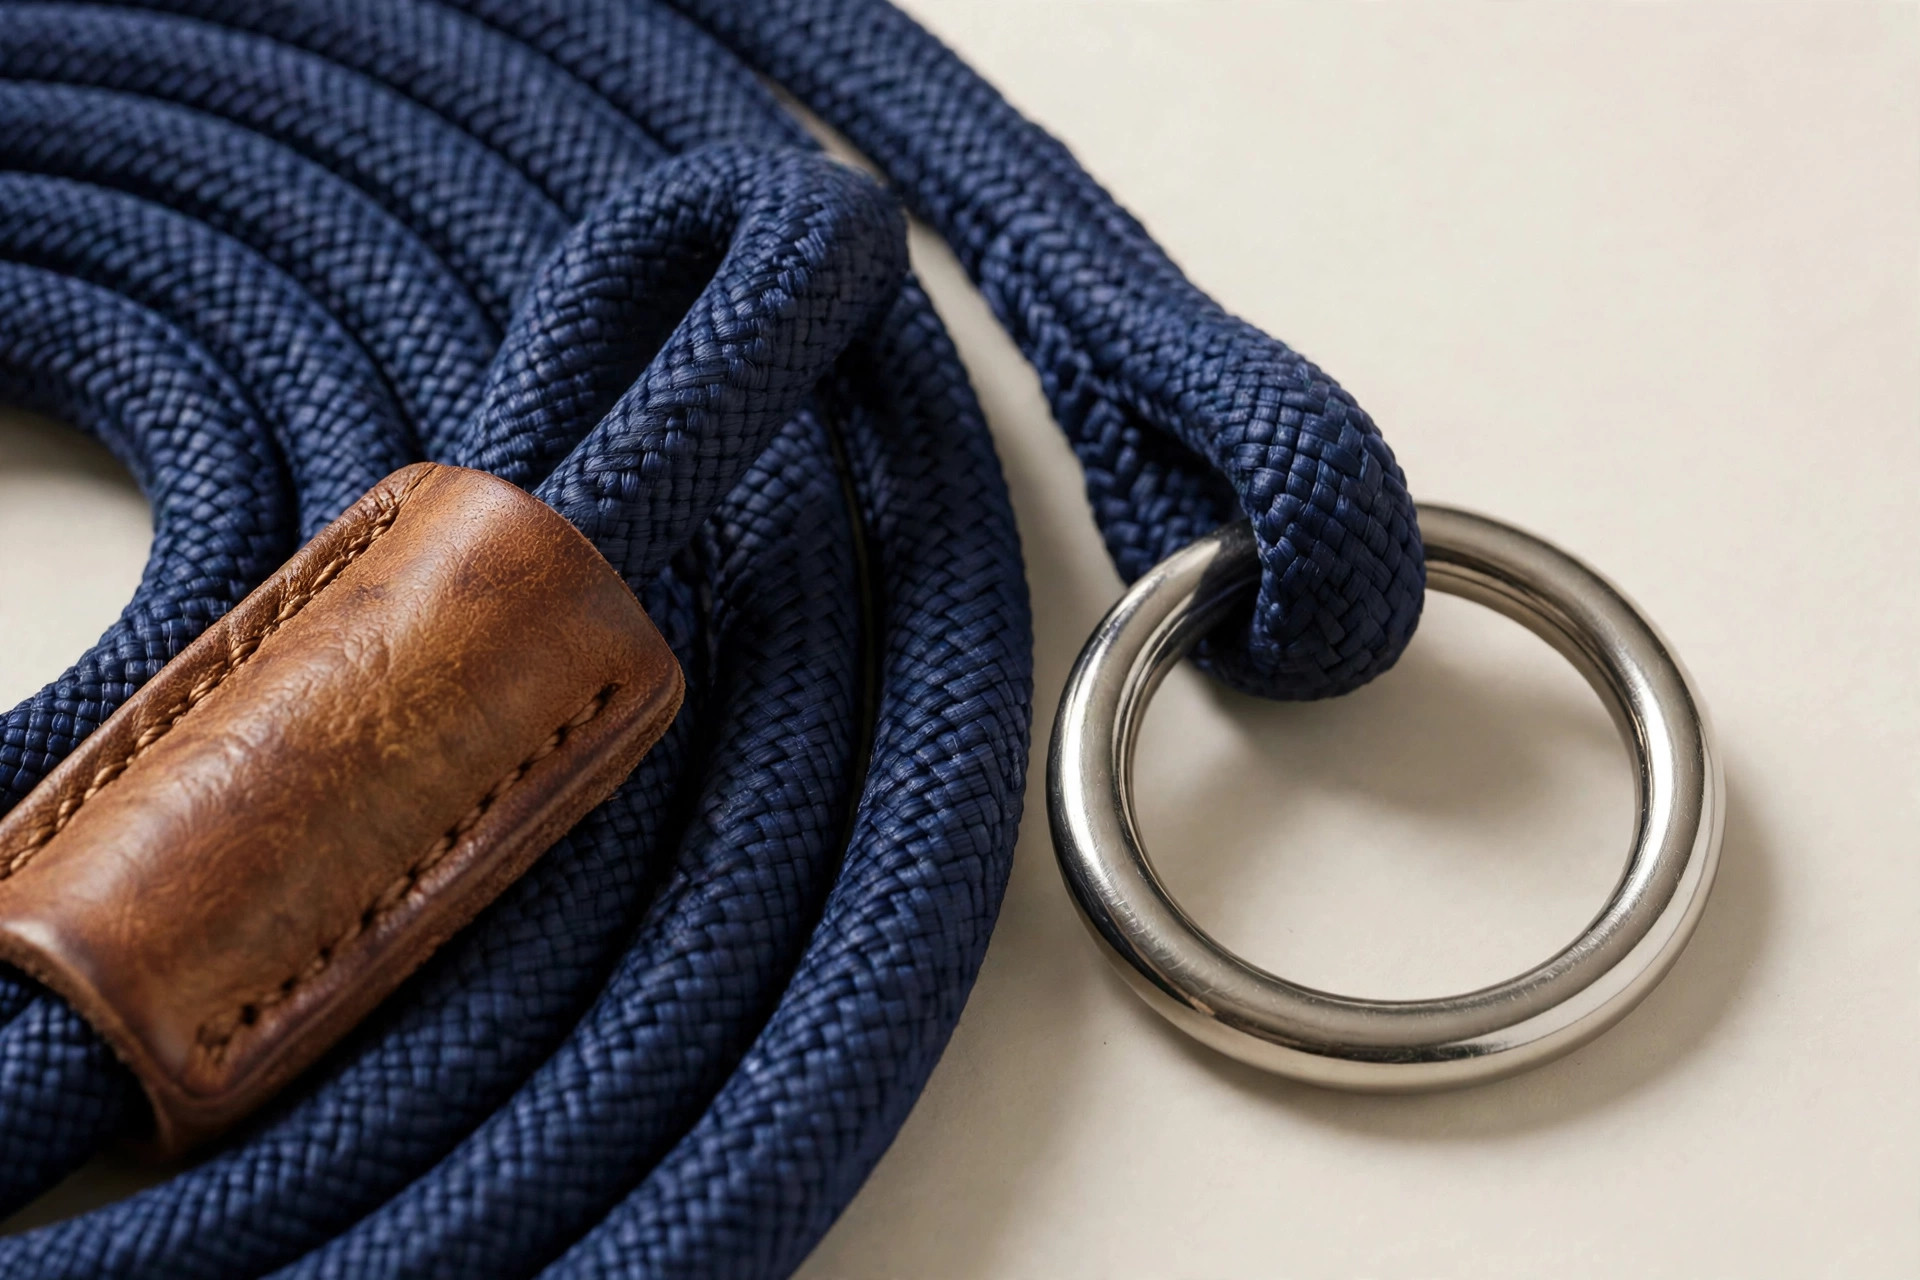
Strip away the drama: a P-leash — trainers call it a slip lead — is one continuous piece of rope. No collar. No buckle. One end threads through a metal ring to form a loop; the other end is your handle. Pull and the loop snugs; release and it loosens. That is the entire mechanism. The “P” is just the shape the loop makes when it hangs.
The version I keep in my training bag adds one small detail that changes everything: a leather toggle on the rope that works as a stopper. It physically prevents the loop from closing past a set point. My rule now is simple — no stopper, no slip lead.
Why trainers swear by them (and why the internet is furious)
Here’s the honest split. Professional gundog trainers have used slip leads for decades because they deliver instant, precise feedback — a two-centimeter lift of the hand says “hey, check in with me” faster than any amount of verbal nagging. When timing is everything, nothing else talks that fast.
The internet hates them because plenty of people use them badly. Yank a slip lead hard and repeatedly and yes, you are compressing a trachea. That damage is real, and I’ve seen the vet bills to prove it. But look closely at that sentence: the villain is the yanking, not the rope.
My take, after eighteen months of daily use: a slip lead is a communication device, not a correction machine. If your training plan is “jerk harder until he stops,” put the rope down and walk away. No tool survives that philosophy — a flat collar in those hands does damage too.
How to fit it right (the part everyone skips)
Most slip-lead horror stories begin with bad fitting. This routine takes forty seconds and prevents nearly all of them:
- Make the “P.” Hold the handle, let the loop hang in a P shape, and slide it over the dog’s head.
- Park it high. The loop belongs right behind the ears, tucked under the jaw — the most sensitive steering point on the whole dog, where the lightest touch registers. Let it slide down to mid-neck and you’ve lost all precision; that sliding-down is where the choking stories come from.
- Set the stopper. Slide the leather toggle down until the loop physically cannot close tighter than two fingers’ width around the neck. Ten seconds. This is the single most important step in this entire article.
- Talk with your wrist, not your shoulder. Signals are tiny upward flicks, released instantly. If your arm travels more than a few inches, you’re overdoing it — the dog stopped listening three yanks ago.

1.5 meters or 3 meters? Pick by job, not by dog size
The Steady-Pull comes in two lengths, and the choice is simpler than the product page makes it sound. 1.5 meters is the city length: sidewalks, traffic, café patios, vet waiting rooms — anywhere the dog should stay within conversational distance. 3 meters is the training-field length: recall practice in the park, long-line-style work, giving a young dog room to make choices you can then reward.
The wrong purchase? Buying the 3-meter for crowded city walks “because longer is better.” Longer rope in traffic is just more rope to tangle around a stranger’s legs. Ask me how I know.
When NOT to use a slip lead
This is the section most product pages refuse to write, and it’s the one that matters most:
- Flat-faced breeds. Pugs, French bulldogs, English bulldogs — their airways are already compromised by anatomy. A slip lead is the wrong tool, full stop. Get a harness.
- Young puppies. Under roughly four to five months, the neck structures are still developing. Wait until the vet gives the all-clear.
- Fearful or reactive dogs. Pressure around the neck spikes stress hormones. You do not fix fear by tightening things.
- As a tie-out, ever. Never leave a slip lead on an unsupervised dog; never tie one to a post outside a shop. The safety note on the product page says this. I’m repeating it because people skim.
- If the fitting paragraph felt like homework. Honestly? If setting a stopper sounds like too much effort, buy a front-clip harness instead. There is zero shame in choosing the simpler tool.
The graduation plan nobody mentions
Here’s what no slip-lead seller wants to admit: it’s training wheels. The real goal is a dog who walks on a loose regular leash because he chooses to, not because a loop reminds him every twelve seconds. Most dogs I know graduated in four to eight weeks of consistent practice. After that the slip lead lives in the car “just in case” — and honestly, that glovebox exile is exactly where it belongs.
So, worth buying? If you’re actively training loose-leash walking or recall, and you’re willing to learn the fit — yes. It’s the most honest twenty dollars you’ll spend on dog gear this year. If you just want walks to magically get easier without changing a single thing you do — save your money. The rope can’t want it for you.
The one I’d actually hand a friend
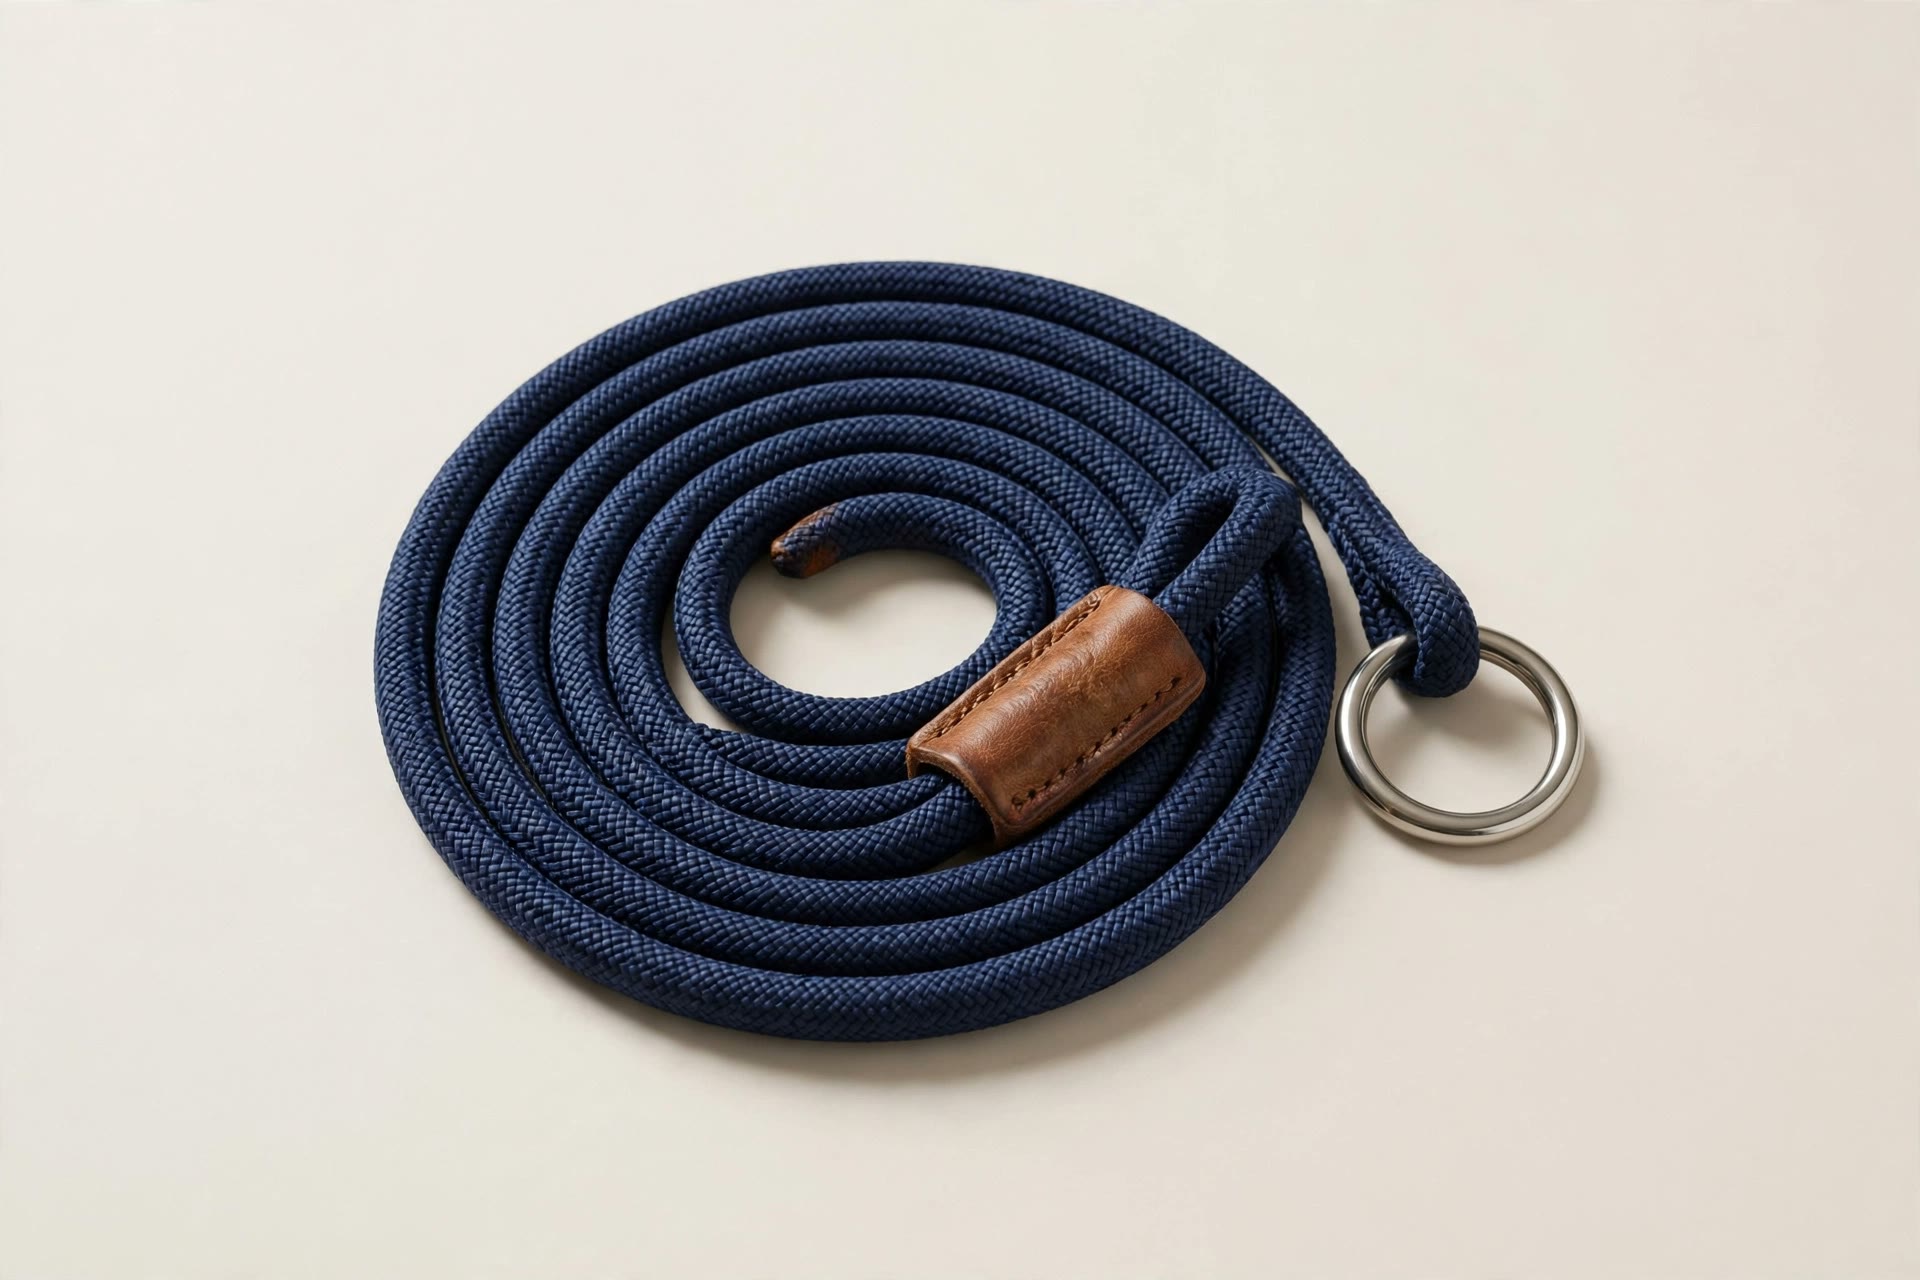
The Steady-Pull Training Leash is the one in my bag: 8 mm climbing-rope nylon, a genuine leather stopper instead of the usual plastic slider, 300 kg break strength, and your choice of 1.5 m or 3 m. It’s the slip lead I’d hand to a friend dealing with a puller — which, after the Labrador-squirrel incident, is literally how I ended up writing this.
Cat Shredding Your Sofa Arms? 3 Ways to Move the Scratching to a Scratcher-Lounge
I noticed the fringe on my sofa arm on a Tuesday morning.
Not decorative fringe. The kind a cat makes with six months of dedicated scratching — little threads sticking out everywhere, foam peeking through in one corner. My sofa cost me $2,800. My cat, Mochi, looked up at me with the calm of someone who had done absolutely nothing wrong.
Here’s what she taught me that morning: cats don’t scratch furniture to spite you. They scratch to stretch their backs, shed the dead outer layer of their claws, and stamp the spot with scent from the glands in their paws. Territory marking, claw hygiene, and a full-body stretch, all in one motion. Yelling at them or spraying water doesn’t stop it — it just teaches them to scratch when you’re not in the room. Sound familiar?
So you don’t fight the scratching. You redirect it. Three moves, and they actually work.
Move 1: Park the scratcher next to the sofa
This is the step most people get backwards. They buy a beautiful scratching post, tuck it into a corner nobody walks past, and then wonder why the cat ignores it.
Ask yourself: why does your cat shred the sofa arm and not the wall? Because it’s on the way. Cats scratch the spots on their daily commute — the sofa arm they vault over, the mattress corner they land on. Scratching is a habit of the route, not the room.
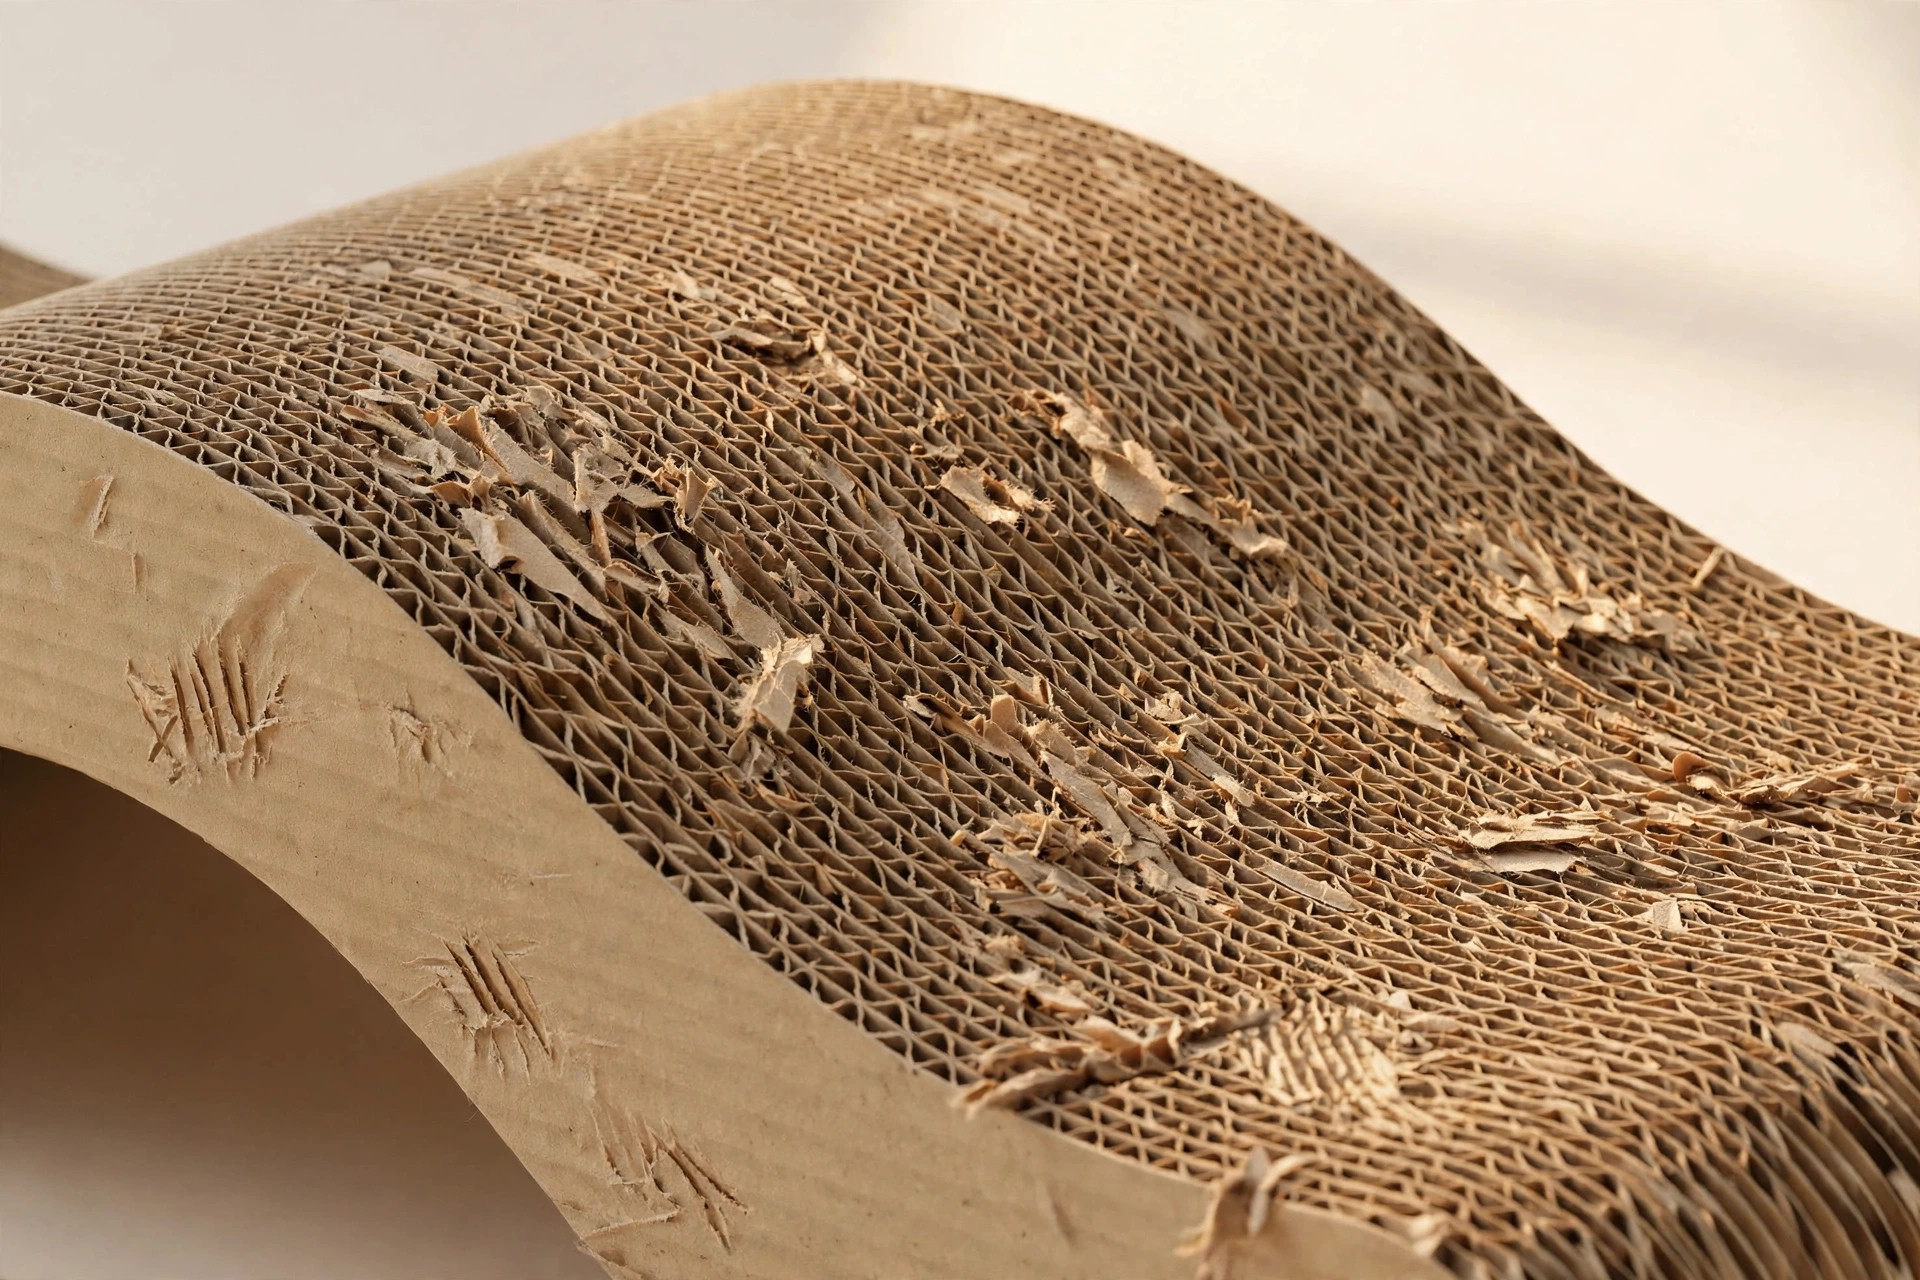
So take your scratcher-lounge and park it right next to the spot your cat already attacks. Not across the room — touching the sofa arm if you have to, even if it looks ridiculous. You’re not asking the cat to build a new habit from zero. You’re hijacking the existing one. This single decision matters more than which scratcher you buy, and I genuinely wish someone had told me before I spent $60 on a sisal tower my cat used as a hat stand for a year.
Move 2: Catnip the onboarding, then pay in treats
A brand-new scratcher smells like cardboard and suspicion. Your cat will sniff it once and walk off.
Sprinkle catnip over the scratching surface — the Scratch & Snooze ships with a free catnip pouch for exactly this purpose. Then use the oldest trick in animal training: reward the first touch. The instant those claws hit cardboard, a treat appears. Not five minutes later. That instant.
Two or three rounds of this and most cats connect the dots. A handful of treats is a lot cheaper than reupholstering a sofa.
Move 3: Pick a shape the cat will actually use
Unpopular opinion: tall sisal posts are overrated. Some cats love them. Mine walked past hers for twelve months straight.
What most cats actually prefer is horizontal scratching — the same motion they use on your sofa arm and your rug. A low, wide scratcher-lounge matches that instinct instead of fighting it. When you’re shopping, check three things:
- Enough surface area. If a cat can’t stretch out fully, it won’t bother. The Scratch & Snooze comes in two sizes: 50 × 25 × 12 cm for cats under 5 kg, and 65 × 30 × 14 cm for cats up to 8 kg. Measure your cat, not your optimism.
- Dense corrugate. Cheap, loose cardboard shreds in a week and the cat loses interest. High-density honeycomb cardboard holds up under months of daily scratching.
- Reversible. When one side wears down, flip it over for a fresh surface. You just doubled its lifespan for zero dollars.
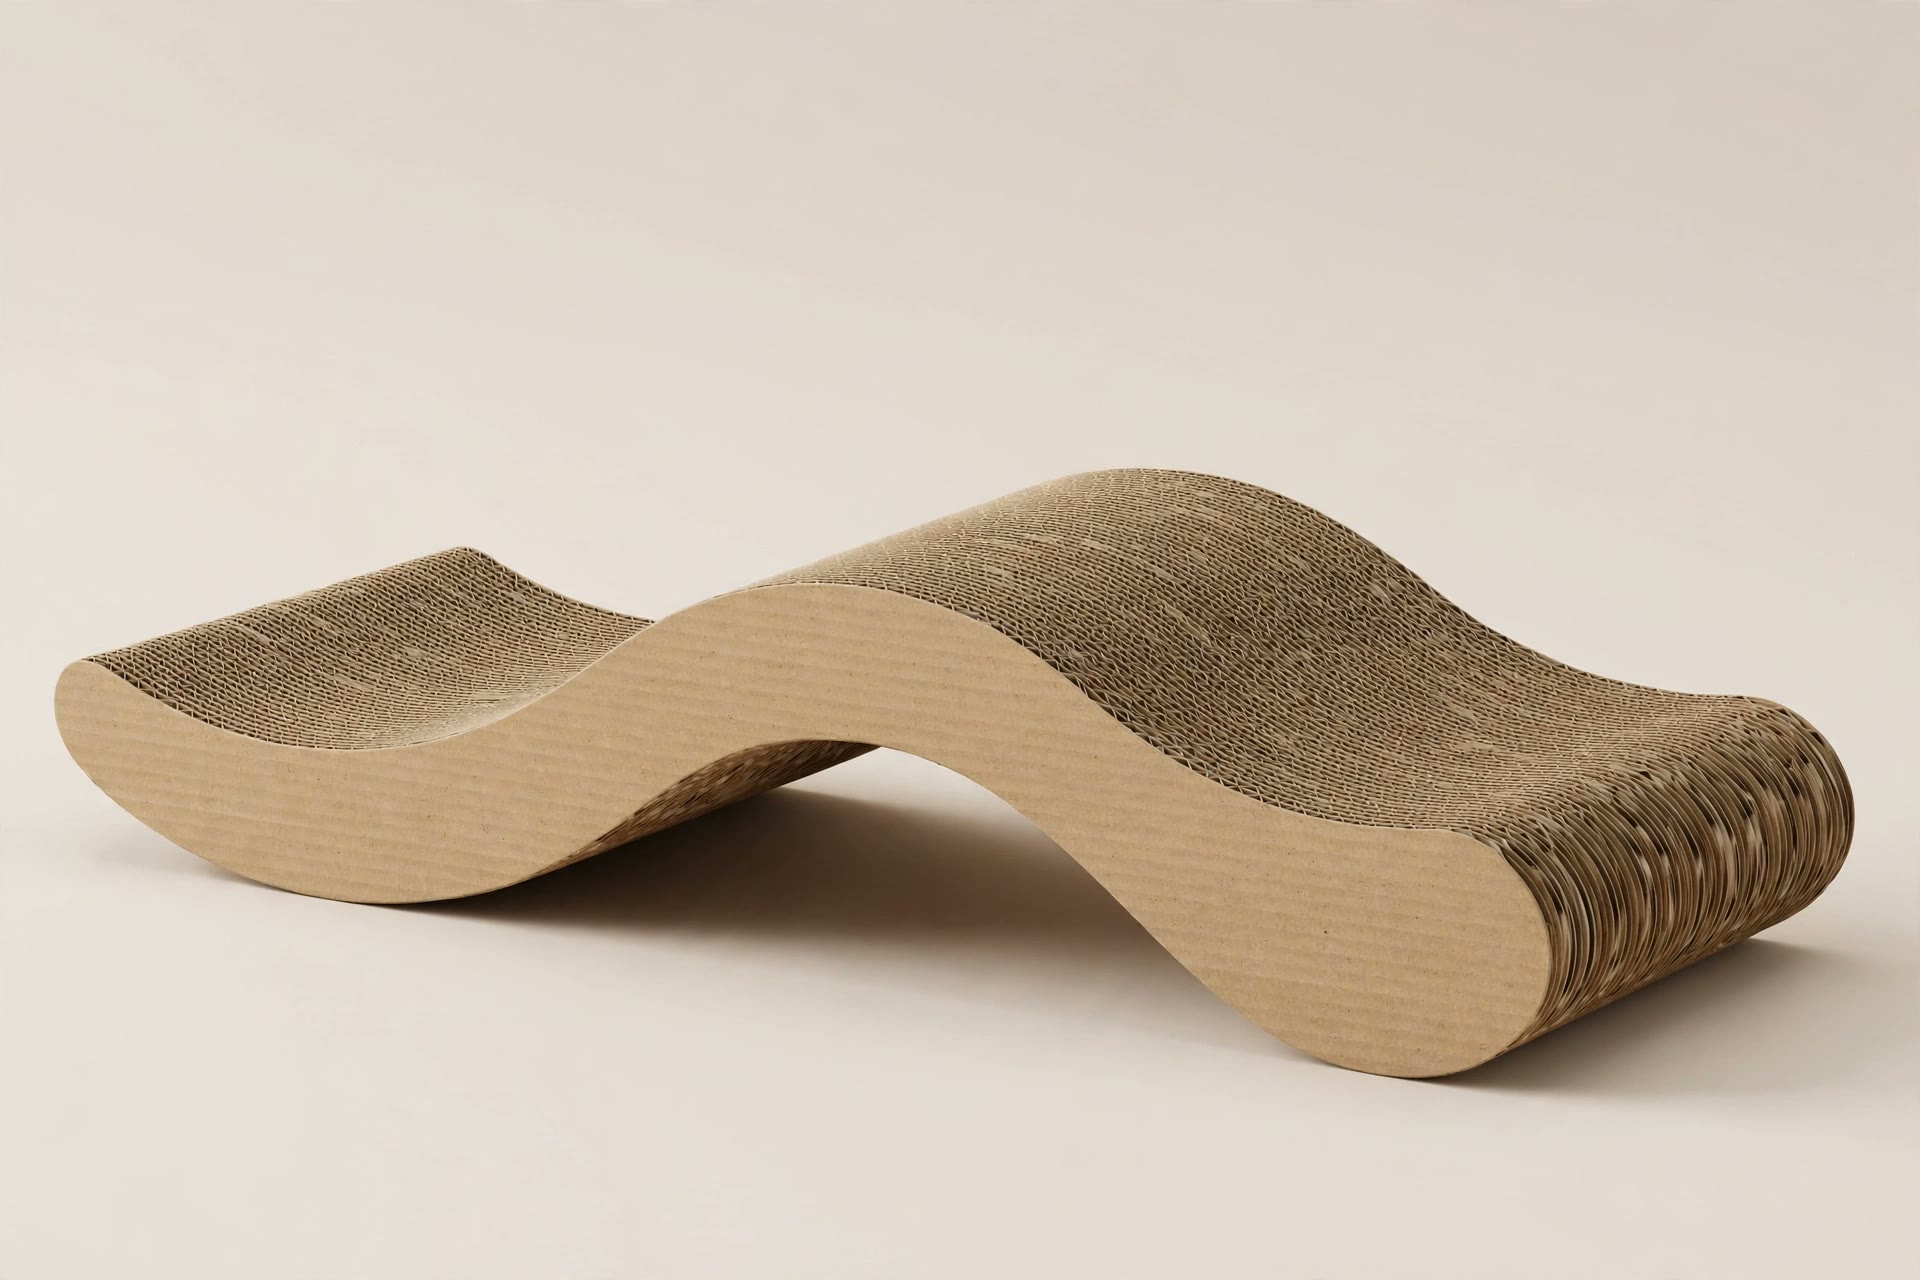
And the curve matters more than you’d expect. An ergonomic, wave-shaped lounge lets the cat scratch, stretch — and then, this is the clever part — fall asleep right there. Cats only nap where they feel safe and comfortable. Once the lounge becomes the regular nap spot, the sofa arm is officially unemployed. That’s a win.
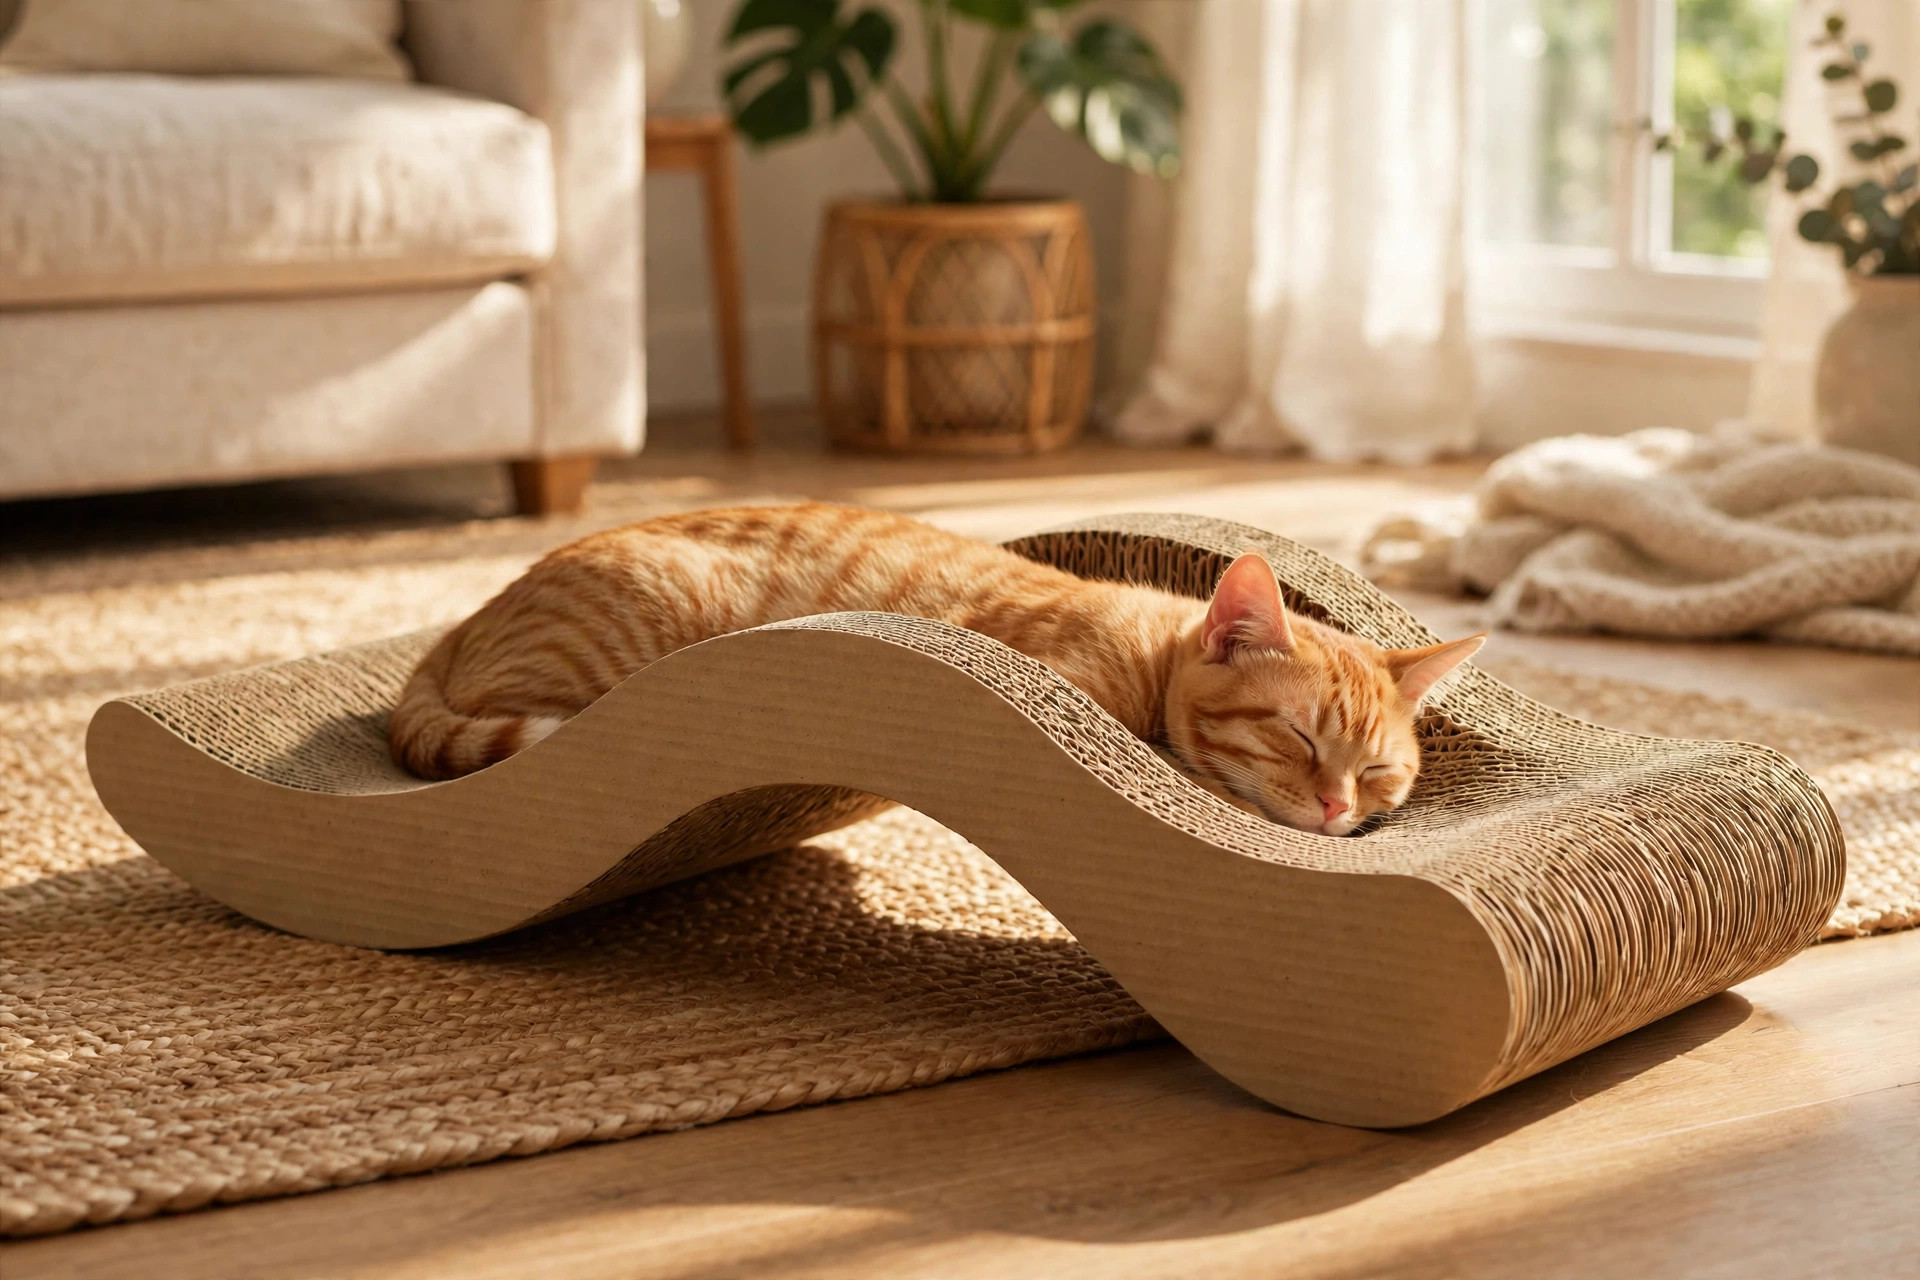
One more group this matters for: senior cats. An older cat with stiff joints won’t climb a tall post, but a low-entry lounge they can step onto in one move? That’s their speed. Same logic for multi-cat households — one good lounge that everyone uses beats three posts that everyone ignores.
What not to buy
Save your money on anti-scratch sprays. I’ve tried three brands. My cat sniffed the citrus one, sneezed theatrically, and scratched the sofa anyway — straight through the spray. A deterrent without an alternative just relocates the damage to your curtains.
Give it two to three weeks
Redirection isn’t overnight. Drape a throw blanket over the sofa arm in the meantime — not as punishment, just as a speed bump while the new habit takes root. Get the placement right and the catnip flowing, and most cats switch over within two to three weeks.
Mochi? She scratches the lounge every morning before breakfast, then sleeps on it until noon. The sofa arm has been fringe-free for four months. I still run my hand over it sometimes, just to enjoy the smoothness.
Featured in this article
Scratch & Snooze – Cardboard Lounge: the 2-in-1 scratcher-lounge from this guide — ergonomic curve for scratch-then-snooze, high-density honeycomb cardboard, reversible for double the lifespan, and a free catnip pouch to get your cat interested on day one.
Your Senior Dog Struggles to Get Up in the Morning? 5 Home Changes That Ease Aging Joints
I first noticed it at my neighbor’s place. Their golden retriever, Mochi, is nine — and every morning she does this slow, creaky push-up off the kitchen floor before her legs agree to work. Not limping, not crying. Just… stiff. Like me after a red-eye flight, except she can’t complain about it.
Here’s the thing most of us get wrong about senior dogs: we wait for a dramatic limp before we act. But joint aging is a slow leak. By the time a dog turns 7 — 5 for large breeds like Labradors and Goldens — the cartilage cushioning their joints is already thinning. You can’t reverse that. What you can do is stop making it worse, and most of the fixes cost nothing.
1. Fix where they sleep first — it’s a 14-hour-a-day decision
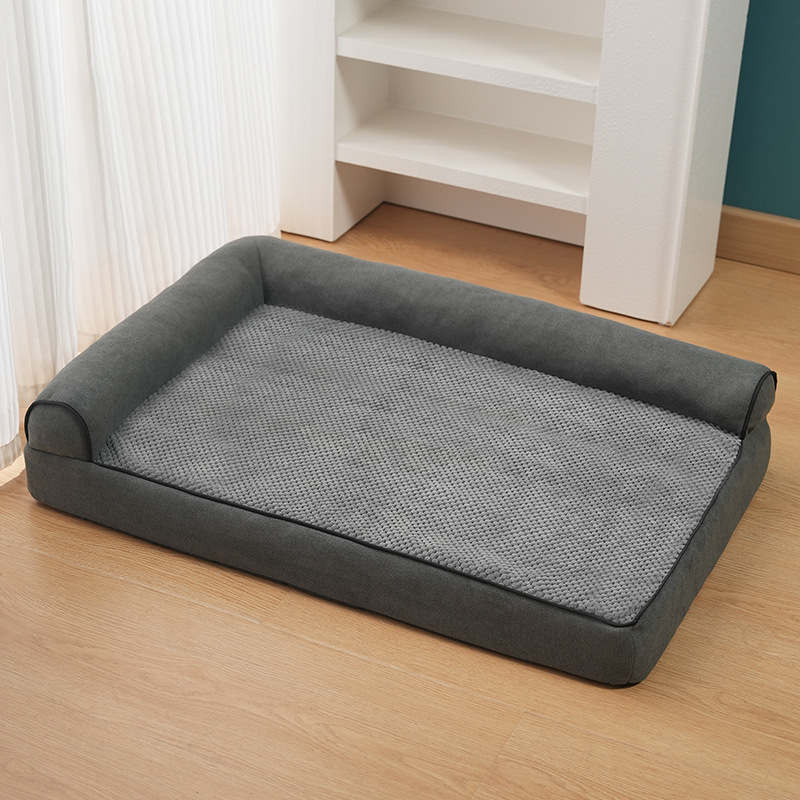
An adult dog sleeps 12 to 14 hours a day. A senior dog? Closer to 16. That’s two-thirds of their life on whatever surface you gave them. A thin flat mat on a hard floor is basically asking aging joints to spend the night on concrete.
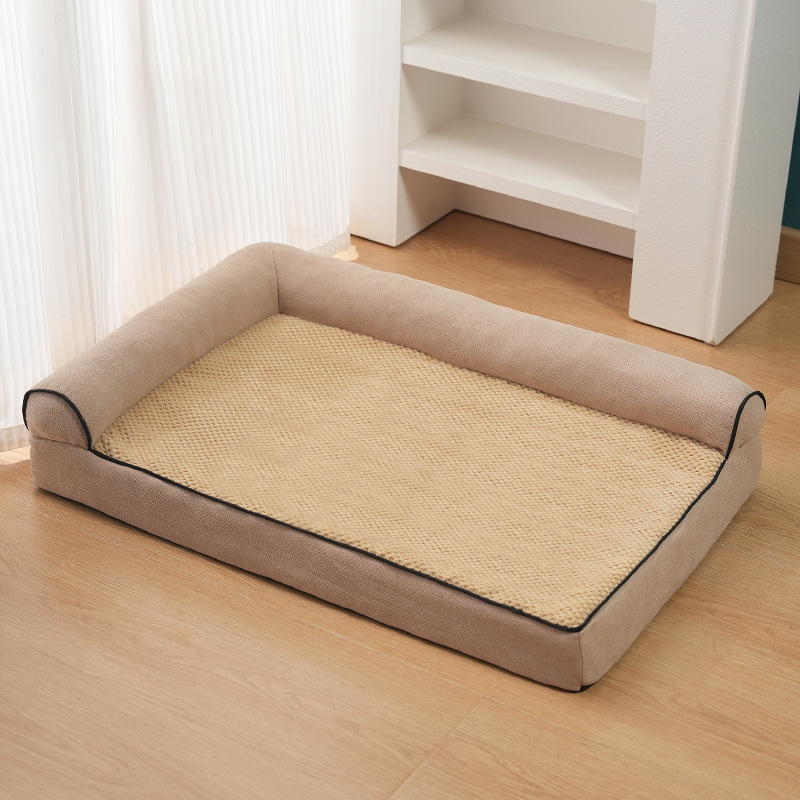
What actually helps is support that doesn’t bottom out: memory foam. The Bolster Sofa Dog Bed uses a memory-foam base that spreads their weight instead of letting hips and elbows press into the floor. The L-shaped bolster isn’t decoration either — older dogs love leaning against something when they sleep, and it keeps them from sliding off the edge when their legs go wobbly at 3am. The cover zips off and goes straight in the washing machine, which matters a lot more than you’d think: senior dogs have more accidents. Ask me how I know.
Is a memory-foam bed overkill? I used to think so. Then I watched Mochi walk past her old flat bed and claim the couch, every single time. Dogs vote with their bodies.
2. Keep the cold off their joints
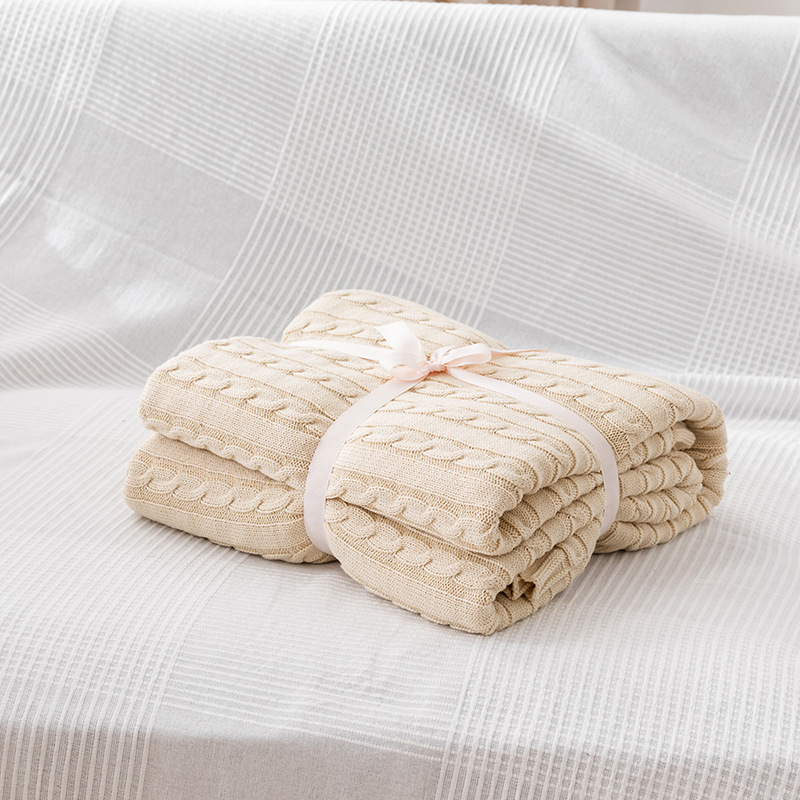
Cold is the enemy of stiff joints — the same reason your grandma’s knees ache every winter. Tile and hardwood feel fine under our socks; to a 30-kilo dog lying on them for hours, they’re a slow chill straight into the hips.
A thick cotton throw over their bed makes a real difference. The Cable Knit Throw Blanket is chunky, breathable cotton — warm enough to cut the chill, airy enough that they won’t overheat. The neutral shades don’t scream “dog blanket” in your living room, either. I drape one over Mochi’s bed in winter and she burrows into it like a burrito.
One thing I’d skip: heated pet pads left on all day. An older dog that can’t move away easily plus unsupervised heat is a burn risk I don’t want to take.
3. Stop the jumping — ramps, not leaps
Every time your senior dog launches off the sofa or out of the car trunk, their front legs absorb two to three times their body weight on landing. Repeat that daily for years, and you get elbow and shoulder trouble stacked on top of the hips.
Get a pet ramp or a sturdy step for the sofa and the car. Yes, it looks dorky. No, your dog doesn’t care. Mochi ignored the ramp completely for the first week and jumped anyway — then one morning she just walked up it like she’d been doing it forever. Patience beats pride here.
4. Shorter walks, more often
The instinct is to keep doing the big weekend hike “for old times’ sake.” Don’t. One 60-minute march can wreck a senior dog for two days; three easy 20-minute strolls keep them moving without the crash. Movement lubricates joints — it’s the best free therapy there is — but the dose matters.
Watch their pace, not your watch. If they’re lagging at minute 25, your walk is 20 minutes long. Simple as that.
5. The weight conversation nobody wants to have
Every extra kilo on a senior dog is extra load on already-thinning cartilage. Vets say most of the senior dogs they see run 10 to 20 percent over ideal weight. That’s like you carrying a 15-kilo backpack all day, every day, on bad knees.
Cut the table scraps — I know, those eyes — measure the food, and swap half the treats for carrot sticks or apple slices. Mochi dropped 2 kilos in three months, and her morning stiffness visibly eased. Diet control is the cheapest joint supplement there is.
The bottom line
You can’t buy your dog new joints. But you can buy them better mornings: a bed that actually supports them, warmth where they sleep, no more sofa launches, smarter walks, and a leaner frame. Start with the bed — it’s the 14-hours-a-day one.
Sleep better tonight: our senior-dog picks
Bolster Sofa Dog Bed — memory-foam support with an L-shaped bolster for leaning. Removable, washable cover.
Cable Knit Throw Blanket — chunky breathable cotton throw to keep the chill off aging joints.
Dog Hair on the Sofa Again? 5 Ways to Survive Autumn Shedding Season (Without Giving Up the Couch)
Last Tuesday I sat down on my couch wearing a brand-new black sweater. Stood up looking like I’d been attacked by a golden retriever-shaped glitter bomb. Miso, my 32-kilo golden, had spent exactly 40 minutes on that exact cushion, and apparently left half her winter coat behind as rent.
October is shedding season. If your dog is blowing their undercoat right now, you’re not doing anything wrong — double-coated breeds dump their summer undercoat every fall to make room for the winter one. My vet told me this while charging me $45 for the privilege. Knowing it’s normal doesn’t make it less annoying, though.
Here’s what actually works at my place. I’ve tested all of this across two full shedding seasons, and my couch is currently clean enough for a surprise visit from my mother-in-law. Total cost: around a hundred bucks. No magic, just stuff that works.
1. Give them a better spot than your couch
Sounds obvious, but it took me embarrassingly long to learn: my dog wasn’t on the sofa because she loved the sofa. She was on the sofa because it was the only truly comfortable place in the living room. The thin crate pad I’d bought when she was a puppy? She wouldn’t touch it with a paw.
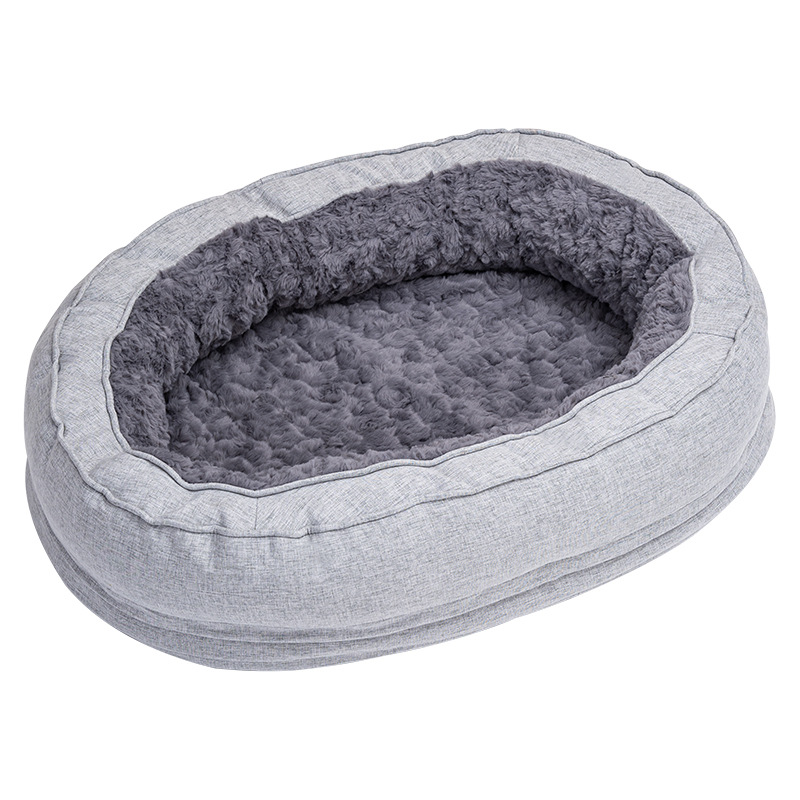
So I upgraded her to a proper donut bed with a raised rim — the kind dogs can actually rest their chin on. Ours is the Cloud Donut Calming Bed, and the rim genuinely cradles her head the way she used to use my armrest. Within three days she was choosing it over the couch about 60% of the time. Not 100%. I’m not going to lie to you — it’s a bed, not a spell.
The part that matters for shedding: it’s fully machine washable. Every Sunday I throw the whole thing in the wash. Seven days of accumulated hair, gone in one cycle. Try doing that with your sofa cushions.
2. Cover the battlefield
For the remaining 40% of couch time, I stopped fighting and started protecting. A throw blanket over the cushion where Miso sits has changed my life more than any gadget I own.
Not just any blanket. I went through a phase with those crinkly plastic sofa protectors and I want to warn you off them: they’re loud, the dog hates the texture, guests think you’re running a furniture store, and they cost $30 anyway. Don’t buy them.
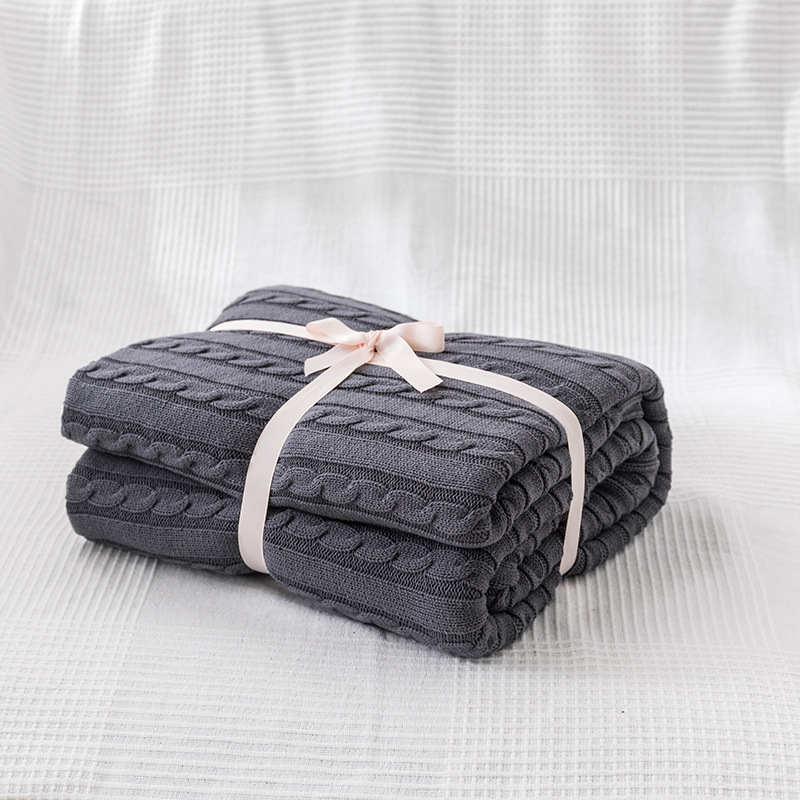
I use a chunky cable-knit throw in a neutral cream that actually matches the sofa — the Cable Knit Throw Blanket draped over the seat cushions. Cotton breathes, so she doesn’t get sweaty and jumpy the way she did on the plastic one. The hair mostly sits on top of the knit instead of weaving into the upholstery, and every evening I take the blanket outside, give it three good shakes, and about 80% of the day’s hair is gone before it ever reaches a vacuum.
3. Brush before the hair lands
This is the single highest-leverage thing on this list and the one everyone skips. Five minutes with an undercoat rake in the evening removes more hair than 30 minutes of vacuuming would later. I keep the brush next to the TV remote. Commercial break, brush the dog. That’s the whole system.
During peak shed — usually a 3-week window in October for Miso — I brush daily. Off-season it’s twice a week. Here’s the thing nobody tells you: daily brushing for a month doesn’t just reduce the mess, it changes the texture of the problem. Instead of hair woven into everything, you get loose surface hair that a lint roller actually picks up. If you’re still only brushing when the dog “looks” fluffy, you’re harvesting the crop instead of preventing it.
4. The dryer trick nobody believes
Your sofa covers, your dog’s blankets, your black pants — toss them in the dryer for 10 minutes on no-heat with a damp microfiber cloth before you wash them. The tumbling loosens the hair, the damp cloth grabs it, and the lint trap collects what your washer would have just redistributed onto everything else.
I do this with the throw blanket once a week and it comes out looking brand new. And please: skip the “pet hair dissolving laundry pods.” They dissolve nothing. They’re $12 of scented water with a dog on the label. The damp cloth costs nothing and actually works.
5. Vacuum on a schedule, not on a crisis
I used to vacuum when the hair reached “visible from the doorway” levels — roughly every 10 days, each time a miserable 45-minute ordeal. Be honest: haven’t you done the same thing, pushing the vacuum around half-heartedly, then sitting down to scroll your phone while the hair is still right there?
Now I run the vacuum twice a week for 10 minutes. Total time: 20 minutes a week instead of 45 every 10 days, and the house never reaches crime-scene status. If guests are coming, I do the couch first with the upholstery attachment. Three minutes. Nobody has ever noticed.
The bottom line
You’ll never eliminate shedding — and you shouldn’t want to, it’s how their coat works. But there’s a big difference between “my house has a dog” and “my house IS a dog.” A washable bed she actually prefers, a throw blanket that takes the hit for your sofa, and five minutes of brushing during commercial breaks: that’s the whole system. Try it for two weeks and tell me the couch doesn’t look different.
Gear that actually earns its place
Cloud Donut Calming Bed — a raised bolster rim she can rest her chin on, fully machine washable so the weekly hair reset is painless. Shop the Cloud Donut Calming Bed
Cable Knit Throw Blanket — chunky cotton knit that catches hair on top of your sofa instead of inside it; shake it out in 30 seconds flat. Shop the Cable Knit Throw Blanket
Y-Harness vs H-Harness for Dogs: Which Chest Harness Should You Actually Buy?
The cough is what got me. My neighbor walks a French bulldog — 11 kilos of muscle and opinions — and every evening I hear the same thing through the hallway: a harsh little honk-honk every time the dog lunges at a pigeon. Collar. Of course it’s a collar.
Here’s the short version for the impatient: if your dog pulls, is flat-faced, or coughs on a collar, get a Y-front harness. If your dog already walks like a gentleman and you just want something light, an H-style is fine. But the letter matters less than one thing most shoppers skip entirely — keep reading.

What the letters actually mean
Flip a Y-harness over and look at the chest piece: one strap runs down the middle of the breastbone and splits toward each shoulder. Like a Y. When the dog hits the end of the leash, the force lands on the chest and shoulders — bone and muscle — while the airway stays completely clear.
An H-harness is two loops — one around the neck, one around the chest — joined by a strap along the back. Dead simple, very light, genuinely less material on the animal. The trade-off? On a hard lunge, more of that pressure sits higher up, closer to the throat, and fit decides everything.
Neither design is a scam. But they are not interchangeable, and the pet aisle loves pretending they are.
Who should buy the Y (that’s most of you)
Three kinds of dogs. No debate:
- Pullers. A 25-kilo Lab hitting the end of a leash generates serious force. You want that on the chest. Period.
- Flat-faced breeds. Frenchies, pugs, shih tzus — their airways are already narrow. A collar is an insult added to injury.
- Dogs with trachea issues. Especially small breeds like Yorkies and Pomeranians. A vet friend tells me collapsed-trachea cases and collar-walking go together like rain and traffic jams.
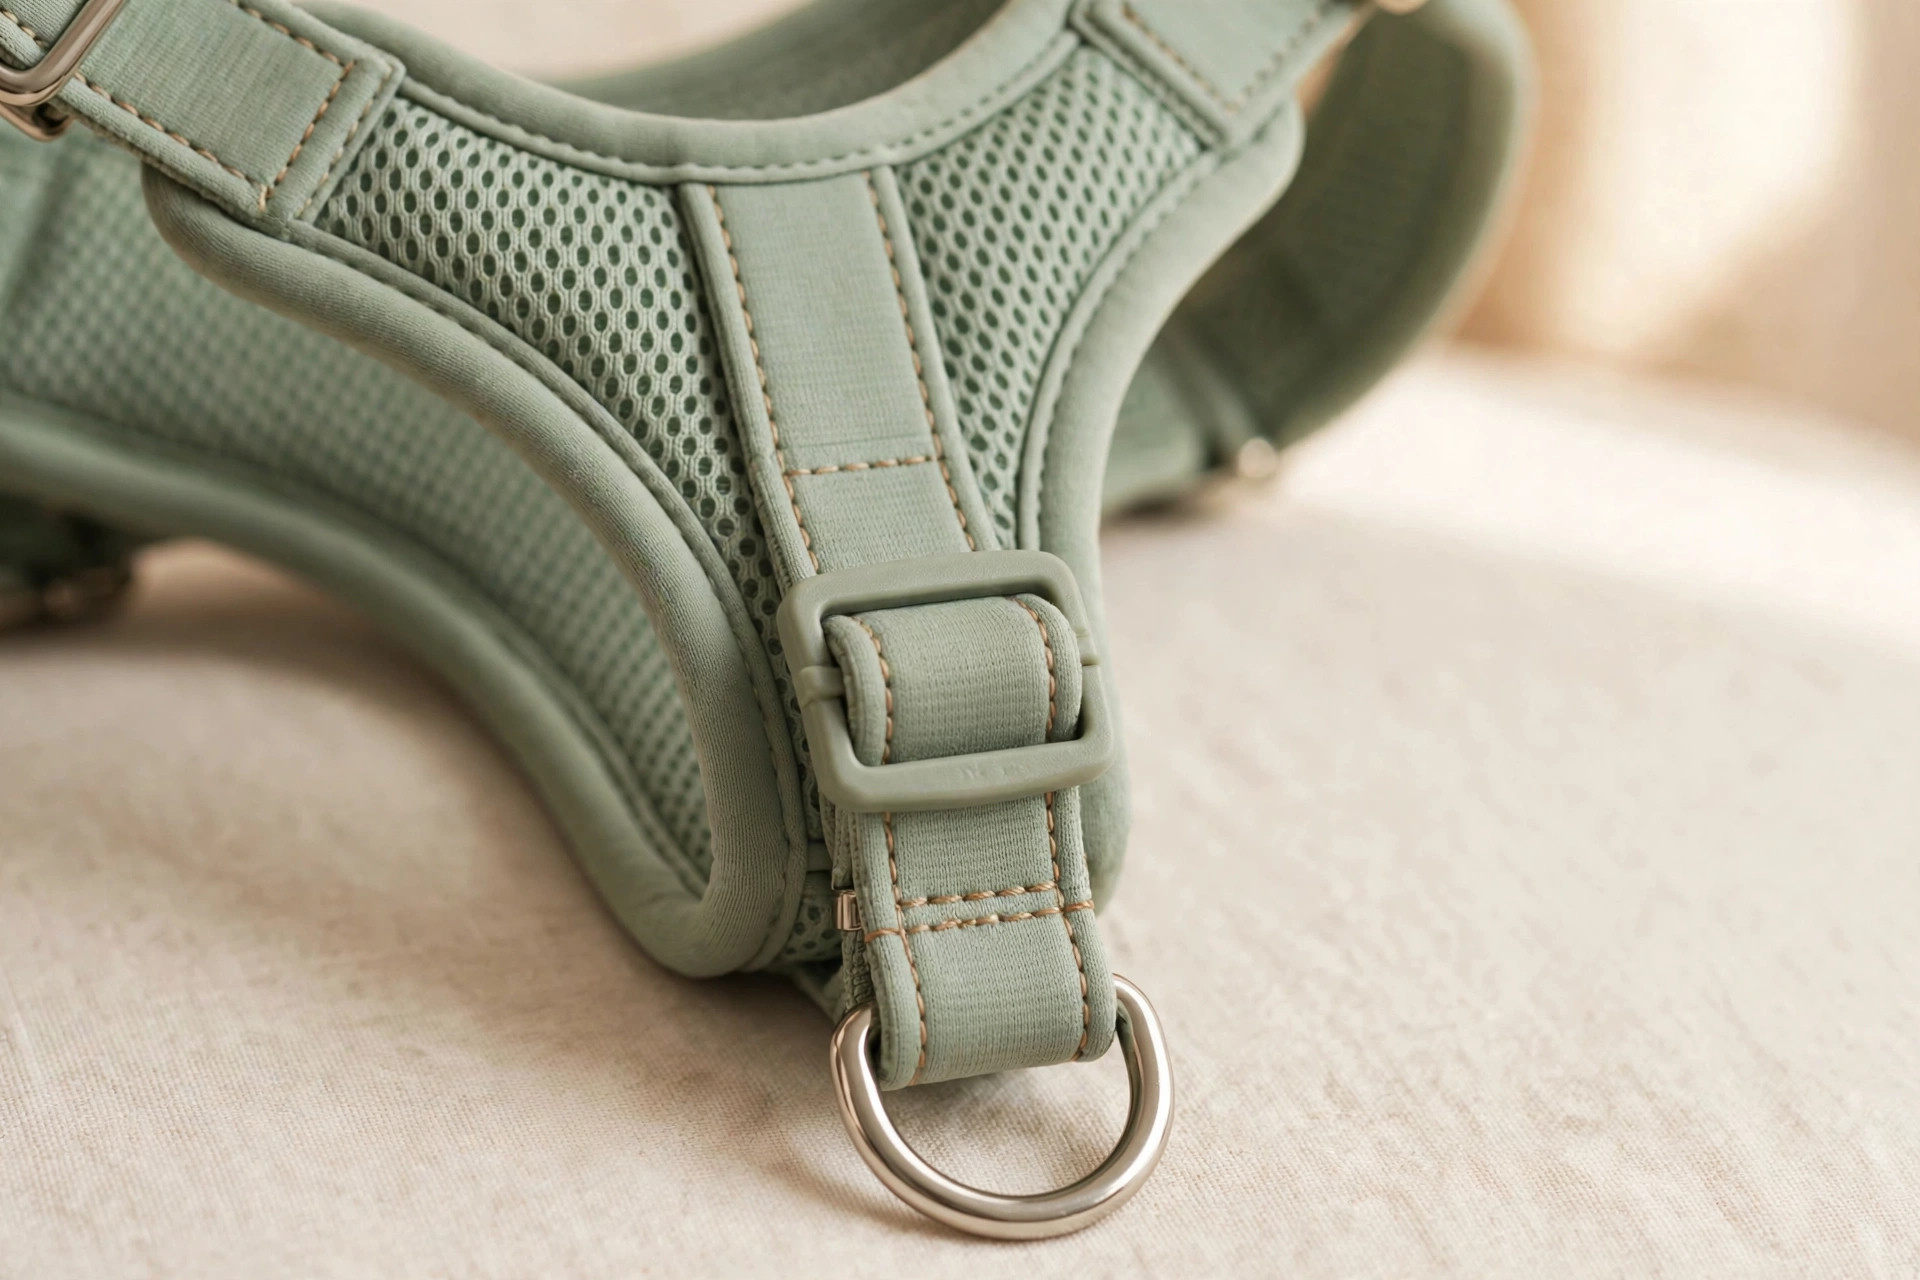
That’s exactly the brief our Comfy-Y Harness was built for: the Y-front keeps pressure off the trachea, the straps are lined with neoprene so they don’t rub hot spots raw on long walks, and there are four adjustment points — which matters more than it sounds, because a deep-chested greyhound and a barrel-chested corgi are basically different species when it comes to fit.
Two details I personally care about: front and back D-rings. While you’re training the pulling out, clip the leash to the front ring — the dog gets gently turned instead of leaning into the pull. And reflective trim, because half my walks happen after dark and drivers are categorically not paying attention.
So when is the H-style the right call?
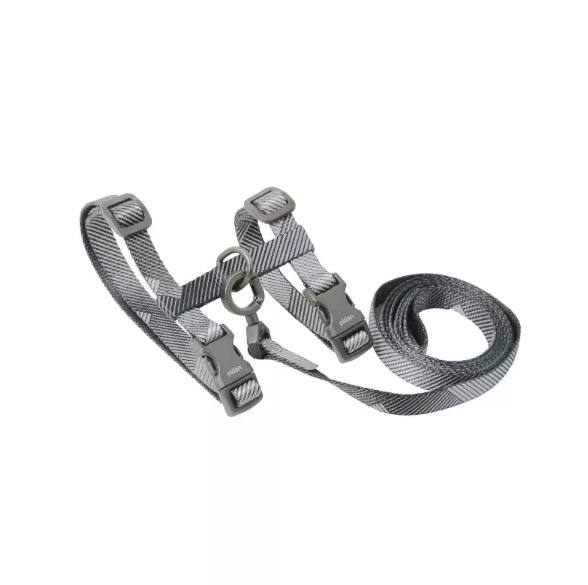
For cats, honestly. An H-harness is light, minimal, and escape-resistant when fitted right — exactly what you want on an animal that can levitate out of anything with buckles. That’s why the H-style harness we carry is pidan’s cat set: breathable mesh, an H-shape that spreads pressure evenly, made for cats still learning that the outdoors exists.
Got a dog that already walks politely on a loose leash? An H would do fine too. But here’s my honest take: most people shopping for a harness are shopping because the collar stopped working. And if the collar stopped working, you don’t need “lighter” — you need the pressure moved somewhere safe. That’s the Y’s whole job.
The fit test that matters more than the letter
You can buy the perfect harness and still get it wrong. The rule: measure around the widest part of the chest, just behind the front legs, and slide two fingers between strap and body. Not one. Not three. Two.
The Comfy-Y runs S (30–45 cm chest), M (40–60 cm), L (55–75 cm). When in doubt, size up — a slightly roomy harness adjusted down always beats one straining at the buckles. And re-check the fit after ten minutes of walking: straps settle, fur compresses, and the “perfect” living-room fit is usually a notch too loose by the time you reach the park.
One thing I’d skip: those cheap padded “vest” harnesses with zero adjustment points. They look plush in the product photo and rub raw spots behind the front legs by day three. If a harness can’t be adjusted in at least three places, I don’t trust it. That’s not a sponsored line — it’s just what I’ve seen.
A quick word on “no-pull” harnesses that tighten
You’ve seen them: harnesses marketed as no-pull that work by cinching tighter around the chest or armpits when the dog lunges. Technically they reduce pulling. They do it by making pulling uncomfortable — that’s not training, that’s a threat. I’d rather clip to a front D-ring and actually teach the dog, which takes about two weeks of boring consistency. Save your money and skip the tightening ones.
Bottom line
Puller, flat face, or sensitive throat → Y-front, and make sure it’s padded with real adjustment points. Calm dog, easy walks → honestly either works, pick what fits. Cat → the H-style cat set — don’t put a dog harness on a cat and hope for the best.
Still hearing that honk-honk from the hallway, by the way. I’ve told my neighbor twice. Some battles you just lose.
Our picks
- Comfy-Y Harness — Y-front, choke-free, neoprene-padded, front + back D-rings, reflective trim. For pullers, brachycephalic breeds, and trachea-sensitive dogs.
- pidan H-Harness & Leash Set — breathable mesh H-harness for cats, escape-resistant, leash included.
Related products: Comfy-Y Harness · pidan H-Harness & Leash Set · Harness Training Your Cat
Cat Won’t Sleep in Their New Bed? How to Choose a Cat Bed They’ll Actually Use
I once spent $65 on a memory-foam cat bed. “Orthopedic support,” the listing said. “Vet recommended.” My cat slept in the cardboard box it shipped in. For three weeks.
If that sounds familiar, here’s the uncomfortable truth: your cat isn’t ungrateful. You’re just shopping like a human, not like a cat.
Cats sleep 12 to 16 hours a day — roughly two-thirds of their entire life. And they don’t pick a sleeping spot the way we pick a mattress. They choose by three instincts older than any pet store: warmth, safety, and scent. A $65 bed that ignores all three will lose to a laundry basket every single time.
So why would any sane cat pick a cold plastic basket over a plush bed? Because the basket has walls.
1. Watch how your cat already sleeps
Before you buy anything, spend two days watching. Most cats fall into one of two camps: curlers and sprawlers.
Curlers tuck into a tight ball, tail over the nose, paws tucked away. If your cat sleeps like this 80% of the time, they want to feel surrounded — a leftover from kittenhood, when the pile of siblings was the safest place in the world. Sprawlers flop on their backs, belly up, legs everywhere. They want space and airflow.
Buy for the cat you have, not the aesthetic you want on Instagram. A sprawler will never love a deep nest bed, no matter how cute it is.
2. Walls are a security system
For curlers, tall walls aren’t decoration — they’re the whole point. A high rim tells the cat’s nervous system one thing: nothing can sneak up on me, I can fully relax.
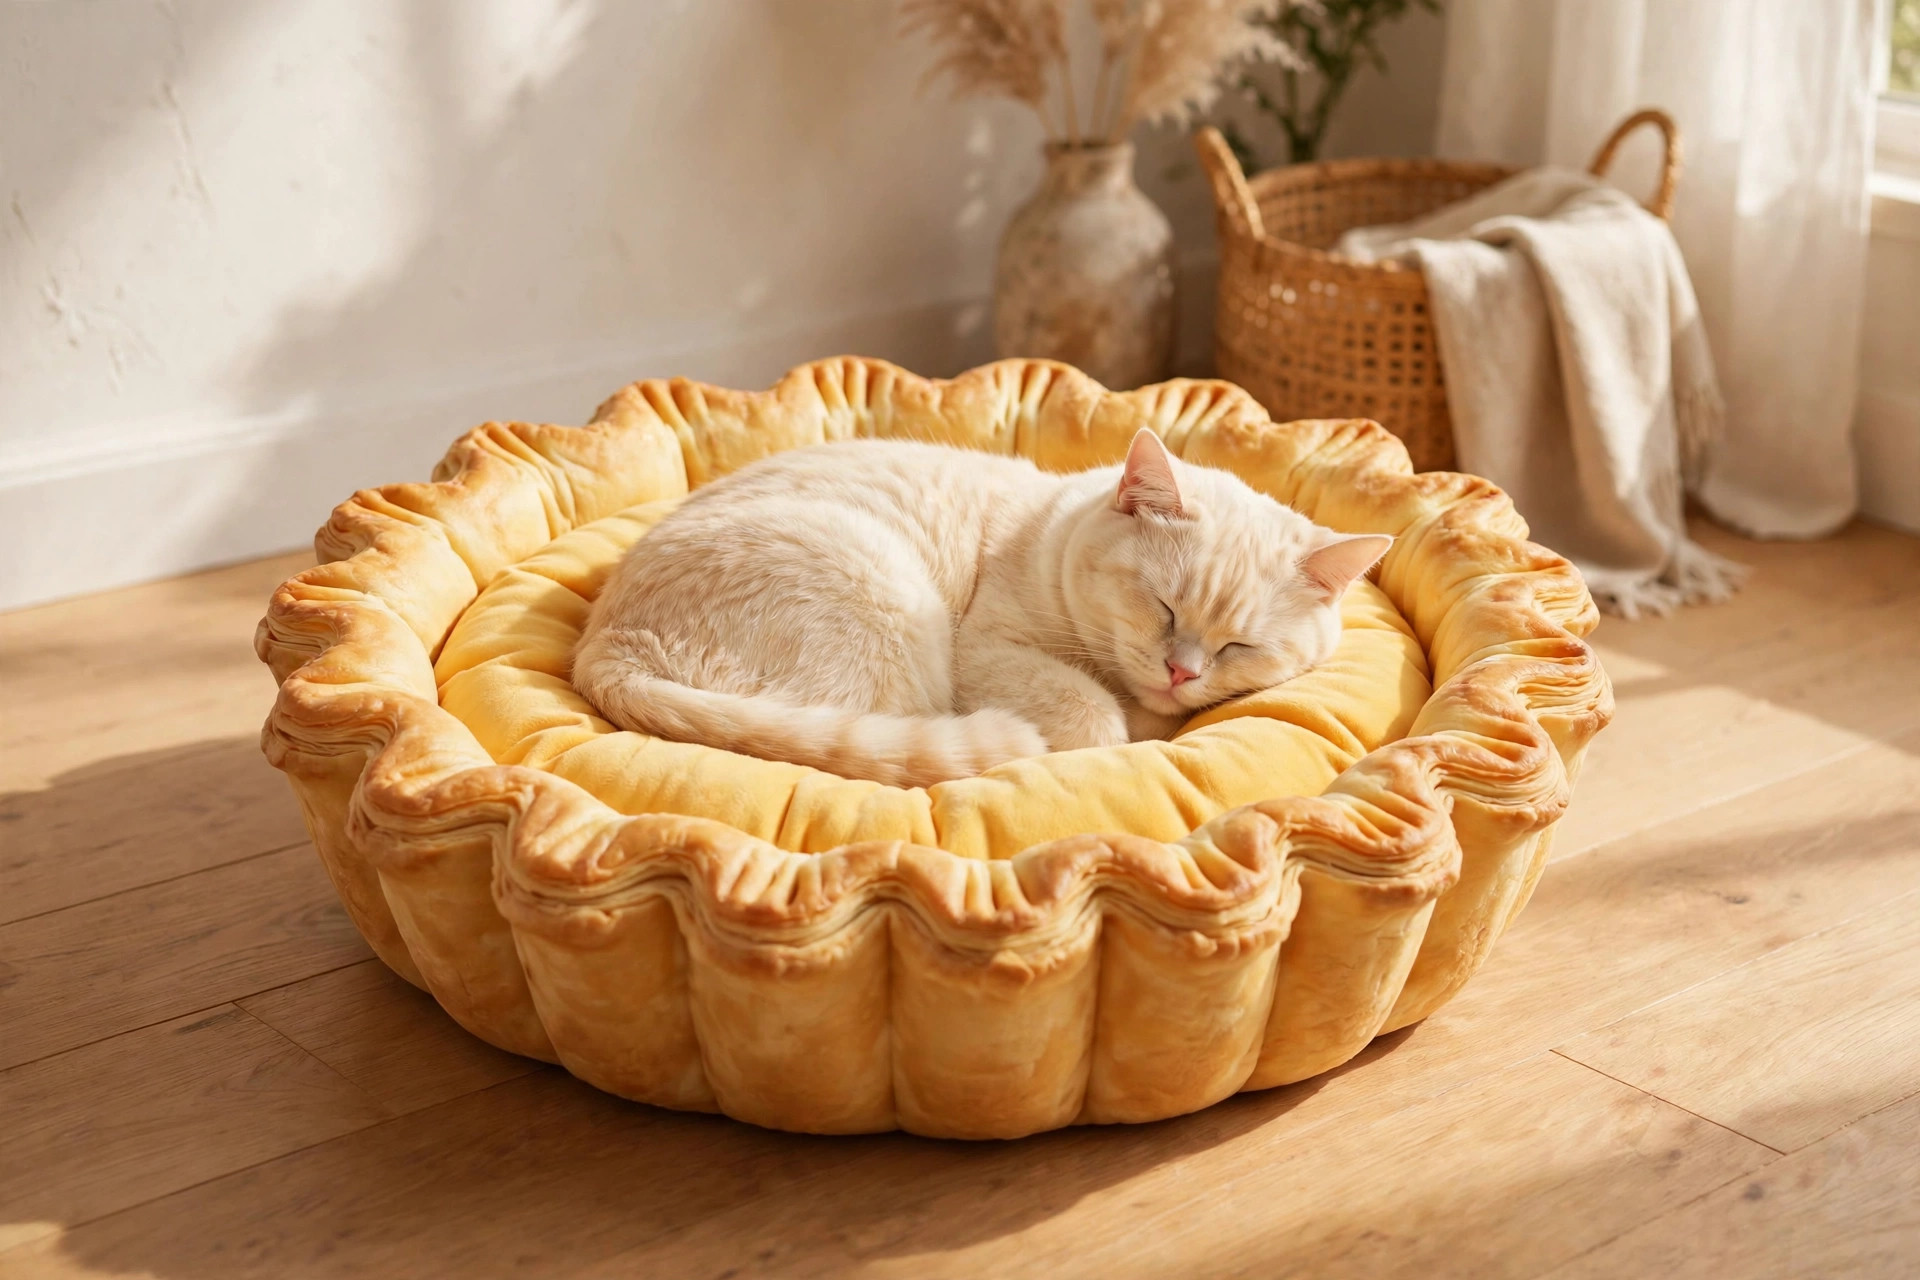
This is exactly why the Custard Cup Bed works. Shaped like a Portuguese egg tart (yes, really), its tall rounded walls recreate the nest feeling cats crave, while the cloud-soft PP cotton cushioning cradles them like they’re back in the litter pile. The plush exterior traps body heat, which matters more than you’d think — cats run a degree or two warmer than us and are constantly hunting for warm pockets.
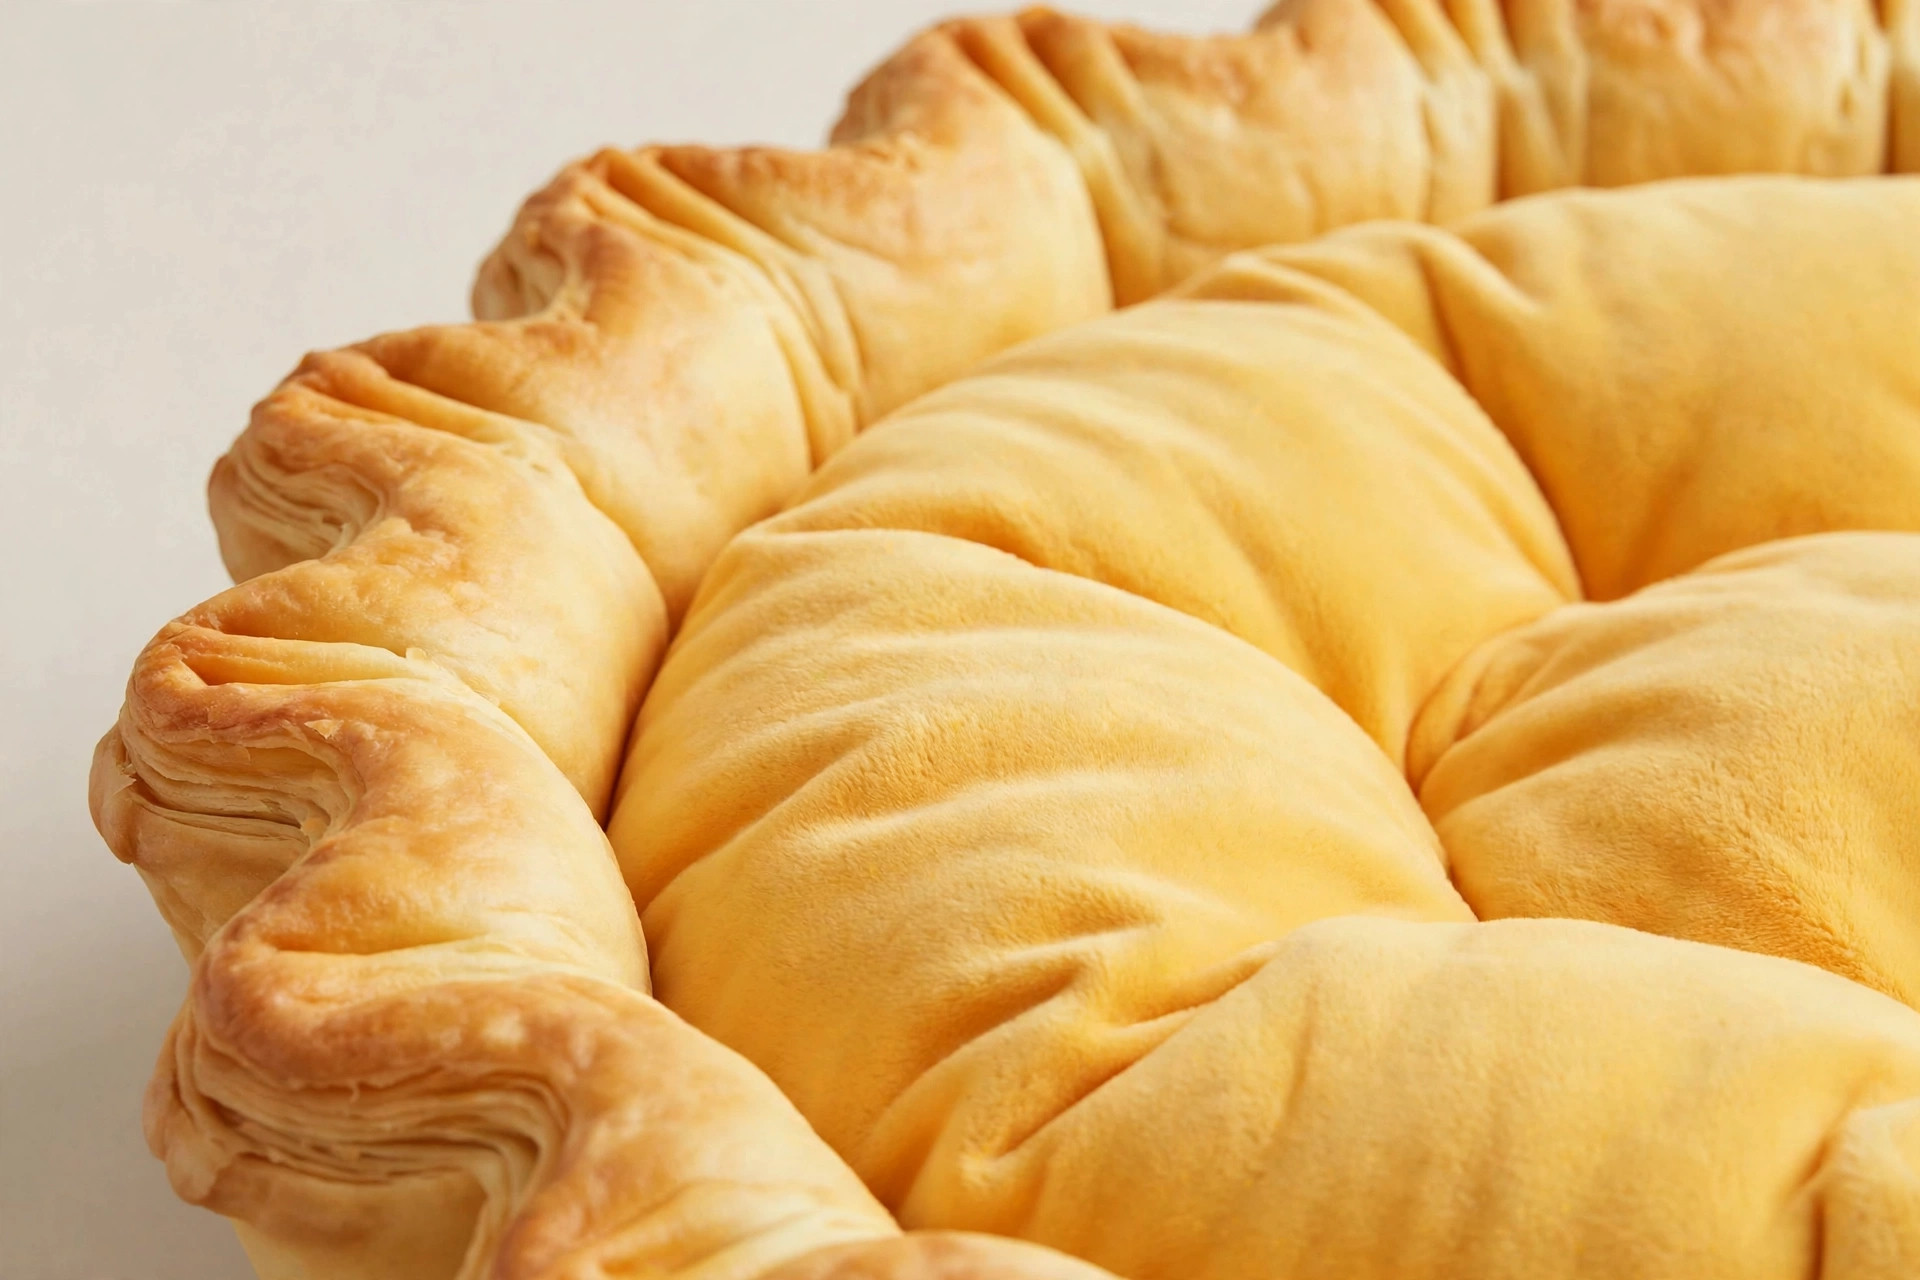
One honest note: the S size (45 cm diameter) fits cats up to 4 kg. My neighbor’s 6.5 kg Maine Coon mix tried to squeeze into one and looked like a muffin overflowing its tin. Measure your cat, and pick M (55 cm, up to 7 kg) if there’s any doubt. A bed that’s slightly too big is fine; a bed that’s slightly too small becomes a decoration.
3. The chin-rest test
Here’s something most bed listings never mention: watch where your cat puts their chin. The sofa armrest. The edge of your laptop. The windowsill lip. Cats love propping their heads on a low ridge — it lets them doze while keeping nose and ears above “ground level,” staying lightly on alert.
The Seashell Snuggle Bed was clearly designed by someone who noticed this. Its scalloped shell ridges are chin rests built into the architecture — little nooks where cats tuck their heads. The velvet-short plush interior is exactly the texture cats knead compulsively. You know the drill: paws pumping, eyes half-closed, drooling slightly.
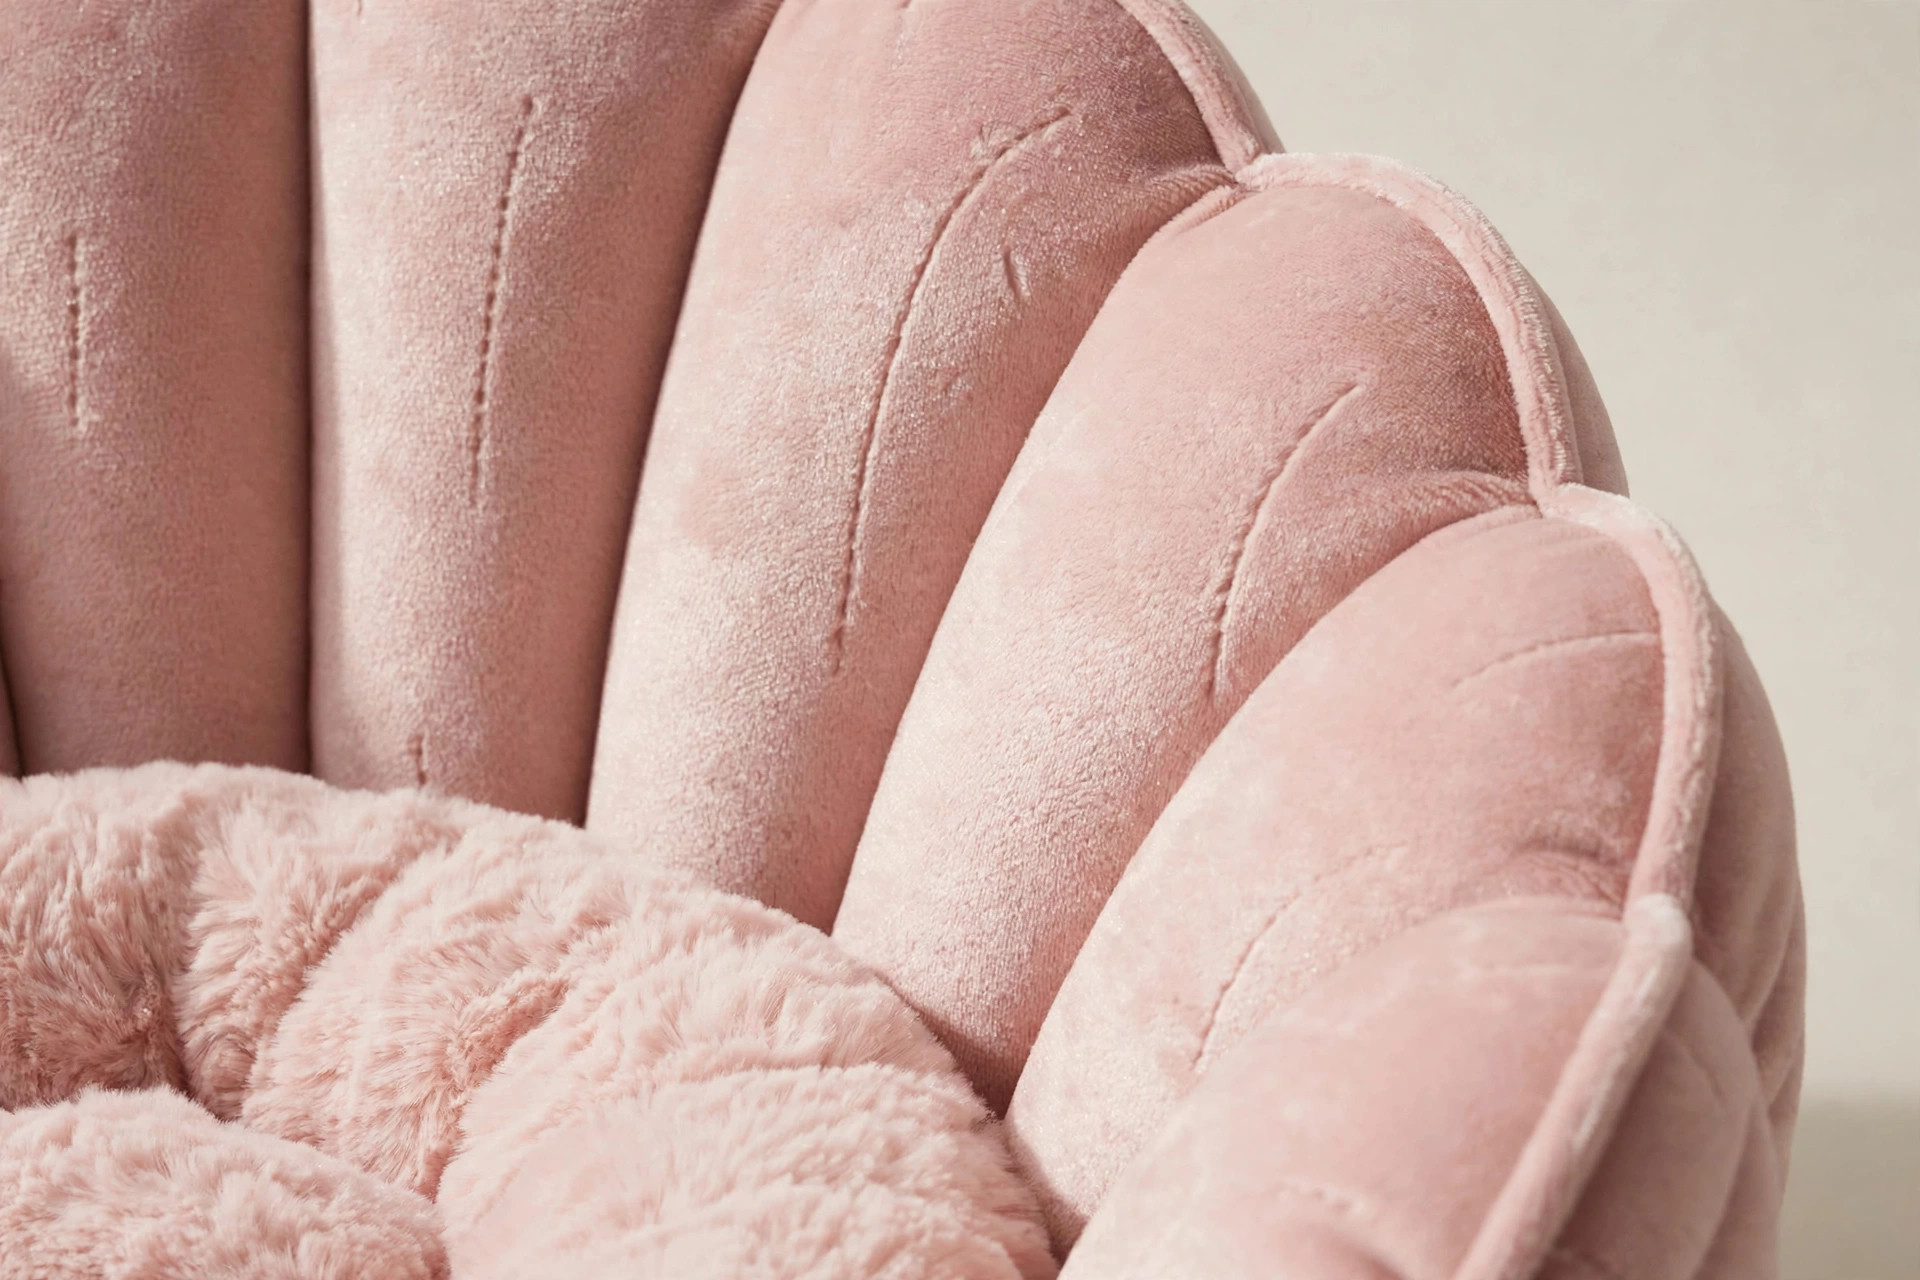
It’s also the better pick for cats who run warm — the design breathes more than a deep nest — and the weighted bottom keeps it planted when a 5 kg cat launches into it at full speed. Sizes run M (up to 5 kg) and L (up to 8 kg).
4. If you can’t wash it, don’t buy it
A cat bed that can’t go in the washing machine has a lifespan of about six weeks. After that it smells like old salmon, and your cat stages a quiet boycott — sleeping right next to it, pointedly, on the clean floor.
Both beds above are machine washable on a gentle cold cycle (air-dry the seashell one to keep the velvet happy). This isn’t a nice-to-have. Cats choose sleeping spots largely by scent, and a bed that smells like “me, clean” beats a bed that smells like “fish, three weeks ago” every time.
5. Location beats the bed itself
You can buy the perfect bed and still fail if you park it next to the washing machine. Put it somewhere warm, slightly elevated if possible, and quiet — a sunny corner, not a hallway. For the first few nights, toss in a worn t-shirt that smells like you. It sounds ridiculous. It works.
The one thing I’d skip
Can I be blunt? Skip the giant “luxury designer” bed for a 3 kg kitten — a tiny cat in a cavernous bed feels exposed, not pampered. And skip electric heated beds for most healthy adult cats. They already run warm, and a power cord plus a chewing-prone kitten is a combination I don’t love. Warmth from good insulation, like the heat-trapping plush on these two beds, is plenty.
Our picks
Curler who burrows into blankets? Custard Cup Bed — nest-like walls, heat-trapping plush, non-slip base.
Chin propped on everything, kneads like making dough? Seashell Snuggle Bed — scalloped chin rests, velvet-soft interior, weighted stable base.
Either way: measure first, wash often, and don’t take it personally if the box still wins for the first week. Cats need time. The bed needs to smell like home. Give it both.
Related products: Custard Cup Bed · Seashell Snuggle Bed
Harness Training Your Cat: From First Fitting to First Walk (A Beginner’s Guide)
Let’s be honest: the reason most cat harnesses end up abandoned in a drawer is not the cat. It’s us. We strap it on, expect a nice walk, and get a cat doing a dramatic backwards flop like we’ve betrayed them personally.
My first attempt at harness training took exactly four minutes and ended with a scratched forearm, a harness tangled around a chair leg, and a cat who didn’t speak to me for two days. The second attempt — three weeks later, with a completely different approach — ended with my cat walking me down the garden path on a Saturday morning. The difference wasn’t the cat. It was the method.
Why a Harness, Not a Collar
This one is non-negotiable. A cat’s trachea is delicate — a sudden lunge on a collar-and-leash combo can bruise it, and vet bills for throat injuries start around $200 and go up fast. So why do people still try collars? Because collars are easy. But easy isn’t safe.
A proper cat harness distributes pressure across the chest and shoulders. The H-shaped design in particular spreads the load so evenly that even a full “nope, going home” dash-back won’t choke your cat. If your harness doesn’t do that, it’s the wrong harness. (I’ll recommend the exact one I use at the end — no, this isn’t a sales pitch, it’s the one that survived two years of weekly walks.)
Picking the Right Harness (Most People Skip This)
Not all cat harnesses are created equal. Vest-style ones are cozy but hot in summer; cheap elastic ones stretch until your cat slides out like a noodle. Here’s my short checklist after trying five different designs:
- H-shape or Y-shape: even pressure distribution, no choking, and much harder to escape from than a figure-8.
- Breathable material: mesh beats nylon in warm weather. Your cat will tolerate the harness 3x longer if they’re not overheating in it.
- Fit check: you should slide two fingers — no more, no less — under every strap. One finger means too tight (they’ll freeze). Three fingers means they’ll be out of it before you reach the elevator.
- Quick-release buckles: because someday your cat will get tangled in a bush and you’ll want it off in two seconds.
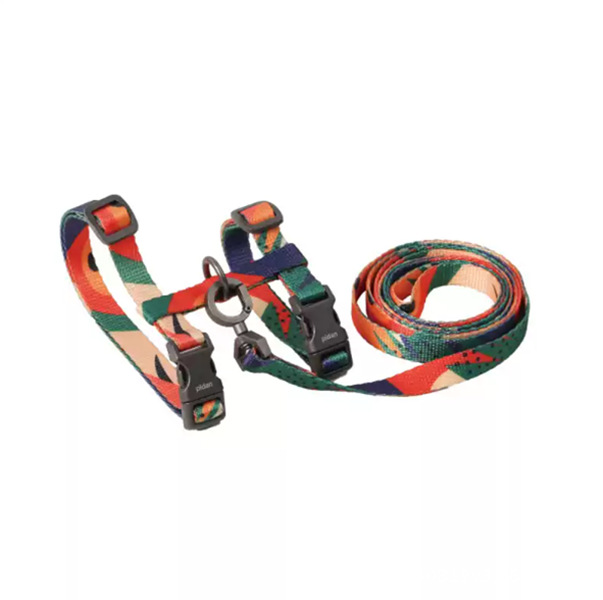
That’s why I stuck with the pidan H-Harness & Leash Set: breathable mesh, an H-shape that resists escapes, and it comes with a matching leash so you don’t have to hunt for a compatible one. The buckles are the quick-release kind, which saved me during the Great Bush Incident of 2025.
The 5-Step Training Plan (Give It 2 Weeks)
Forget the “one weekend” tutorials. Realistic timeline: 10–14 days. Some bold kittens do it in 5. My rescue took 18. Both are fine.
Days 1–2: The Sniff Phase. Leave the harness on the floor near their favorite spot. Let them sniff it, rub on it, ignore it completely. Put a treat on top of it. Do nothing else. Boring? Yes. Necessary? Also yes.
Days 3–5: The Drape. Drape the harness loosely over your cat’s back while they eat. Don’t fasten anything. Five seconds, then take it off and give a treat. Repeat twice a day. You’re building the association: harness = good things happen.
Days 6–8: The Fasten. Fasten it loosely for 30 seconds. Then one minute. Then five. Play with them while they wear it — a distracted cat forgets to be dramatic. Treats after every session. If they flop and refuse to move, that’s normal. Shorten the session, don’t force it.
Days 9–11: Indoor Walks. Attach the leash and let them wander the house with it trailing (always supervised — a trailing leash can snag). Hold the leash loosely. Never, ever tug. If your cat freezes, you wait. If they go somewhere, you follow. You’re the bodyguard, not the tour guide.
Days 12–14: The First Outdoor Walk. Start in the quietest place available — a garden, a calm courtyard, not the dog park on a Saturday. Keep the first session to 10 minutes. Let the cat choose the direction. End on a good note with a treat, before they get tired of it.
Three Things Nobody Tells You
1. Some cats walk you. My cat’s “walk” consists of inspecting three specific bushes and then lying in a sun patch for 20 minutes. That’s not failure — that’s a cat being a cat. Are you really going to argue with someone who naps 16 hours a day about efficiency?
2. Heat matters more than you’d think. Above 28°C (82°F), keep walks short or skip them. A harness adds a layer, and cats don’t sweat it off like we do. Morning or evening only in summer.
3. The leash is a safety line, not a steering wheel. If you feel the urge to pull, stop walking instead. A pulled cat panics; a patient human gets a cat that actually looks forward to walks.
When to Skip the Walk
Not every day is a walk day. Skip it if your cat is hiding, if there’s construction noise outside, or if you can’t give them your full attention. A forced walk teaches your cat that the harness means stress — and then you’re back to the drawer.
What I Actually Recommend
After two years and five harnesses, the one I keep reaching for is the pidan H-Harness & Leash Set. The H-shape distributes pressure evenly across the chest (no choking on sudden dashes), the breathable mesh keeps them cool, the quick-release buckles are genuinely quick, and the included leash is the right weight — not so heavy it drags on a 4 kg cat. It comes in a clean gray stripe and a fun colorful print. Worth every penny, and cheaper than one vet visit for a throat injury.
Start today: order the harness, leave it on the floor, and give your cat two weeks. That drawer deserves better.
Related products: pidan H-Harness & Leash Set · Comfy-Y Harness · Y-Harness vs H-Harness for Dogs